On October 13, 2018, I led the British squadron to defeat at the Battle of Cape Ortegal during the
Texas Broadside! convention held on board the Battleship
Texas. You can see that fiasco at:
https://mymodelsailingships.blogspot.com/2018/10/no-scenario-ever-goes-as-planned.html. On October 28, we had a chance to refight that battle with (mostly) different players at a friend's house. The result was another convincing victory; but the outcome was completely different.
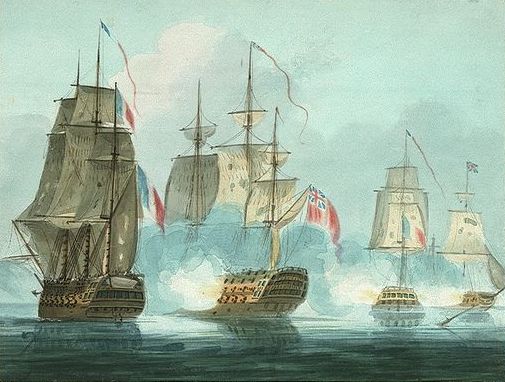
This time I commanded the French fleet, and one of the French players from the convention was my other player. There were three British players commanding the four ships. The starting position was the same as the convention, so I didn't take a picture of that. The picture below is from the previous game, as the starting position is the same.
What I did try and do was to take a picture at the end of each turn segment to make it easier to see how the battle developed. I wasn't completely successful, but I did get a few more photographs than normal. I also now realize that I should probably take a photo and the beginning
and the end of the turn segment, because it might make the action easier to follow. Also, to keep readers from getting too confused later, British ships are in
red and French ships are in
blue.
Since everyone has played the game at least once, I added some rules in that we don't normally use. This time, we played with the Gusts & Eddies rule, Signals rules (along with The Line) and Gun Smoke. So, it was not quite an exact refight of the
Texas game, but the additional rules seemed to add a great deal of fun for everyone. For people not familiar with the
Post Captain rules I'll give a quick explanation of each one:
Gusts & Eddies: Each ship secretly rolls a die (all dice in this game are D12's). On a 1-2 the ship loses 1 movement point and on 11-12 gains 1 movement point. This makes it harder to maintain perfect spacing in the line of battle.
Signals: Captains cannot discuss tactics once the game starts. To make changes in the plan, the squadron commander must fly a signal and the other ships must be able to read it. There's more to it than that, but that is the gist.
The Line: Captains must attempt to maintain the line of battle, although there is a way for Captains to ignore their orders if the situation requires it.
Gun Smoke: Smoke from a broadside remains on the board, and other ships firing through it do so at a penalty.
The game started out fairly historically, as the French squadron maintained a line ahead and watched the British come racing down towards them. At the end of the first phase of turn 1, the situation looked like this:
If it looks like the French squadron has already lost its spacing due to Gusts & Eddies, you would be correct.
HMS Namur is coming up hard under full canvas (she is the rearmost British ship), but has already started taking in sail. I didn't take a picture of the second phase, but honestly nothing happened other than movement. The end of the first turn looked like this:
 |
I've tried to crop photos to keep the extraneous junk out, but
it's not entirely possible. |
At this point, the two squadrons are not quite within 400 yards, so the British continue to move first as they have the wind gauge. Once the range is 400 yards or less, we start rolling for initiative.
HMS Caesar (the British flagship) has an elite crew, so that will give them a +2 on their initiative rolls.
The British continue their charge towards the French line, and signal flags start to fly on
Formidable. What are those sneaky Frenchmen planning?
 |
That "Gusts & Eddies" rule is doing a number on French spacing.
The British, not so much. |
Historically, the French squadron tacked in succession, and tried to move down the British line to concentrate on the isolated
Namur. In this refight
Namur has closed up the gap more quickly, and I was afraid of one of the French ships failing a tack attempt and putting the line into disorder. Also, you can't fire while tacking, so I didn't want to try and have all four ships tack simultaneously; that would give the British several turns of unopposed fire. The French squadron all passed their check to read my signal, and the result was the picture below.
 |
| Turning away from the wolves IS TOO a valid tactic! |
I was still thinking about trying to get the squadron to pound on
Namur and trying to maybe disengage past the British squadron. By wearing (bringing the stern of the ship through the wind) instead of tacking, there is no chance of failing a die roll and hanging a ship out to dry. Historically there were four British frigates on this side of the French that had harassed them before the battle. We simulated this by deciding that each French ship would take a broadside from one of the frigates, who would then disappear as they played no part in the main engagement. They were mostly harmless, as expected, but
Scipion (the rearmost ship in the photo) did take a crew hit. The British ships won the initiative and continued their advance, which put them close enough to open fire. Their shooting was good, and by the end of the turn French plans were starting to unravel.
 |
| Gusts & Eddies strike again, as does British roundshot. |
HMS Hero (second British ship) and
HMS Courageux (third ship) were the first to open fire, and
Hero hit hard. Her broadside brought down
Mont Blanc's main topgallant mast. With that dragging in the water,
Mont Blanc couldn't complete her turn and this threw her out of formation as you can see above.
The next turn saw the British continue their run of excellent shooting. At this point though, the firing became general and the French started to get some licks in too. The French were shooting high, trying to disable British rigging so they could try and get away. The British were shooting low, trying to destroy French guns and force morale checks on the French ships.
The damage was all going for the British, but the French now had an advantage that we didn't realize before it happened. With the French line reversed (except for
Mont Blanc, of course), the French movement order was now reversed too. While the French ships would be moving slower due to heading into the wind, the two lines should shoot past each other fairly quickly. With a little luck, the French might be able to extract themselves from this.
Such was not to be, though. You can see
Scipion at the top of the photo making a getaway (albeit with 30% hull damage), but the rest of the French squadron is truly stuck in.
After this phase, we decided to call the game. In this phase,
Mont Blanc lost her entire mizzenmast over the side and got her Captain killed.
Formidable lost her fore topgallant mast by failing a rigging check. She also had her wheel shot away, which meant a possible collision with
Namur sometime next turn. The Captain of
Namur was salivating at the possibility of a bow rake and a boarding action to boot.
Caesar had overshot the battle because she couldn't turn sharply enough and reload at the same time. While we were running short on time, no British ships were damaged enough to require a command check, whereas three of the four French ships would have to take them. To make it worse,
Mont Blanc's 1st Lieutenant was nowhere near the leader her Captain was, being rated as Green instead of Regular when he took command. That would make it even harder to pass the command checks that would be coming up. British damage was negligible, and
Hero was completely undamaged. Undoubtedly, this was a British victory.
What does this say for the
Post Captain rules, that the same scenario can get such different results? Personally, I think it completely vindicates the system. In the game on the
Texas, the French handled their ships more historically than the British and they won. In this game, both sides handled their ships well, but the British won a definite victory. The same scenario, played twice, gave an expected result (this game), while allowing the possibility of something completely unexpected (the
Texas game). To me, that means the game is well designed.
We probably won't get any more games in before the end of the year, but I think our next one will be some sort of large frigate action. That way, the players don't have to concentrate on maintaining the line and can concentrate on just pounding each other.