A few months ago, I had a follower of the blog ask me how I stored my ships. I told him that I stored them in boxes I built with steel bottoms, so that the magnets on the ship bases held them in place. I also told him that when I built another one, I would put up a blog post on how I did it. Stew, this post is for you.
My first boxes were built quite a few years ago, and were really simple in execution. I cut the metal by hand so that it would fit the inside of the box very closely. I held it in place with Liquid Nails, and went around the edge of the metal with expanding foam. This was done so that any small pieces that came loose would not get under the metal. What I didn't count on is the fact that the plastic of the boxes eventually let go of the Liquid Nails, so that the sheet of metal is just sitting inside the box. It works well enough for everyday storage, but I don't know how well it would protect the ships if dropped. So, in building this box I plan to (hopefully) avoid the mistakes made with my earlier ones.
 |
| An underside view of one of the old boxes. |
 |
| An interior view showing the foam. Yes, this anchorage is getting a little crowded. |
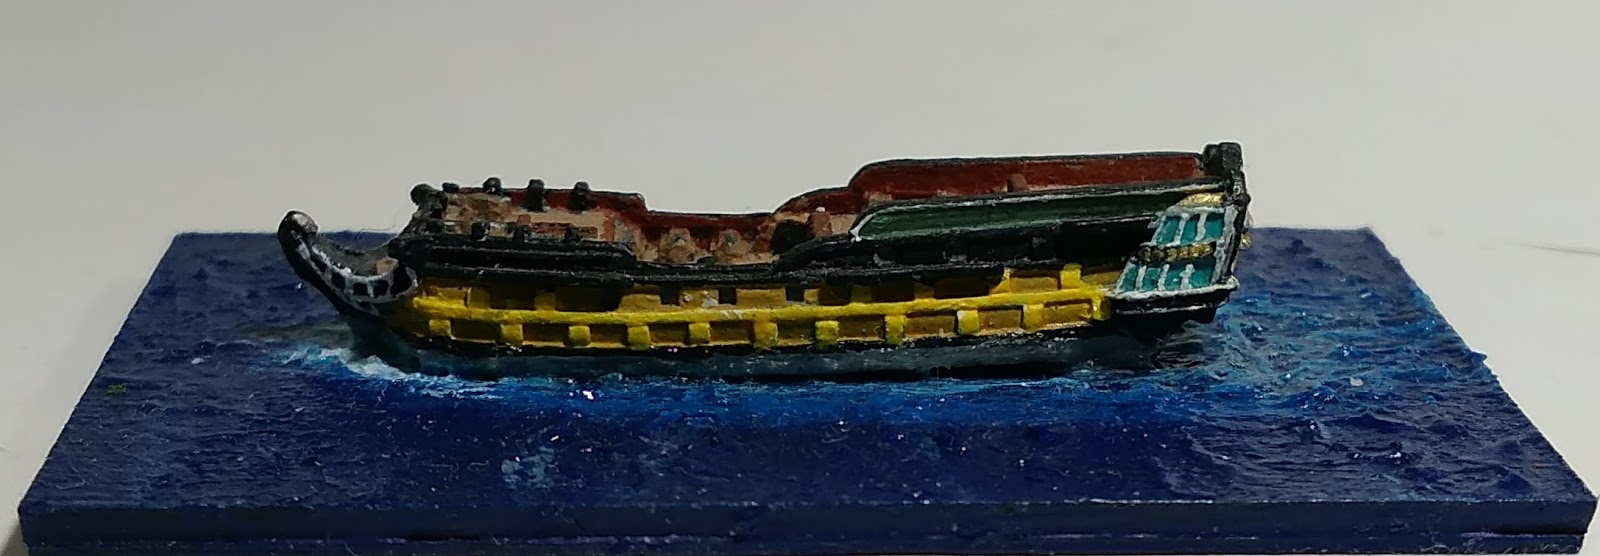
In the second picture, you can see that there are spaces between the different ships. While it looks wasteful, there is a reason for this. If they are too close together, then it's impossible to get a hand inside and overcome the grip of the magnet without knocking around the other ships.
The first thing to do is get together all the raw materials you will need to build the storage box. Before the work starts, let's take a look at what I'm talking about.

The plastic box itself costs $4-5. The piece of sheet steel costs about $8.75, the foam backer rod was $3.50, and the bag of nuts and bolts was 1.25. So, the total cost of materials is $18.50; call it $20 with tax. That's about the cost of one Langton kit when you order the hull, masts and ratlines. I also bought a new hot glue gun to attach the backer rod to the bottom of the box, but I will use the glue gun for more than one project so I'm not counting that here. The idea for the foam backer rod is that it will go around the bottom edge of the box with the steel plate on top of it, thereby serving the same purpose as the expanding foam in the older boxes. Then, I'll drill holes in the steel plate and the plastic box, screw them together and cover the screws with hot glue so that there are no holes in the box itself. Also, that should prevent the screws from moving around and making a larger hole in the plastic box. Will it work? Well, to quote Indiana Jones:

The first thing to do is measure the inside of the box to see how big a piece of backer rod will be needed. A quick measure with a cloth tape shows the inner perimeter of the box to be roughly 60 inches. Since the backer rod inside the bag is 20 feet long, there's no problem there. So, we cut a piece and glue it into the box.
 |
| OK, that came out looking pretty good... |
Now, we just put the steel in on top of it, and ....
 |
| We should be seeing foam around the edges of the steel. Oops.... |
Well, that didn't quite work out as intended. The foam should be visible around the edge of the steel, sealing it so that small parts don't fall into the gap between plastic and steel. Not a fatal problem though; I will just get the steel sheet installed and then figure out how to fill the gap.
At this point, I go ahead and drill the holes needed to screw the plate to the box. I realize that the foam is of no use where I have glued it, so I go ahead and rip it out. After looking around the internet, the closest size drill bit I have to a #4-40 screw is 7/64, so that's what I use. It's important
that the screw holes are drilled just inside the raised rim on the bottom of the box that serves as a foot. You'll see why in the next photo.
 |
You may see holes plugged with hot glue (yeah, like the ones circled).
Ignore them. They are FAKE HOLES! |
Once you have holes drilled in the proper places, take the screws and secure the steel plate to the plastic box. Once that was done, I covered the screw heads on the bottom of the box with glue, so as to try and stop them from pulling through the plastic. (EDIT: This will also prevent them from scratching anything like tables or your other boxes.)
 |
| More FAKE HOLES! Remember, I said I was making this up as I went along. |
Once the steel was in place, I decided that I didn't like the raw edges of the sheet. It was the same trouble of small pieces getting under the metal, along with the possibility of cutting one's fingers. So, I took another piece of backer rod and glued it between the sheet steel and the edge of the box, so that it covered the edge of the steel. The final result looks like this:
 |
Is it pretty? Heavens, no.
Will it work? Heavens, yes. |
And with that, the box is finished enough to use. There are still some modifications that could be made. I'm thinking of possibly cutting off the screws and capping them with glue. Also, i may fill in the space between the foam and plastic walls with something, so as to guarantee that nothing gets under the metal. The biggest change to the next one will probably be to not drill so many holes! Also, I may go back to a galvanized steel sheet, as this one wound up being quite heavy. Still though, this is how I will be building storage boxes for my ships going forward. It took maybe three hours, including the breaks to write this post.