Thursday, December 26, 2019

Hello to you, Spanish Ladies

Obviously, the title for the last post was a takeoff on the "Day-oh!" lyric from Harry Belafonte's famous Banana Boat Song.  For this post title though, I've gone a lot farther back than the 1950's.

This post is particularly exciting to me, as it means I am coming close to finishing part of the Trafalgar Project.  Now that these two are built,  I only need to finish two Montañes class ships of the line for  the Spanish fleet to be completed.  After those are done, I will wrap up the French fleet (4 ships to build) and then the British (8 left to build).

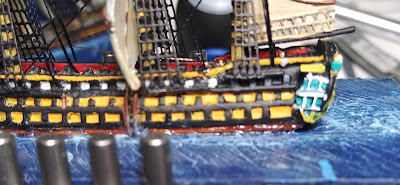
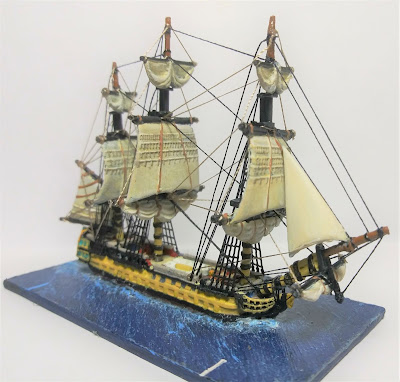
Like some of my other recent builds, there's not a lot to say about these ships.  Good old 74 gun ships of the line, the backbones of almost every fleet in the Age of Sail.  One ship of the two is "at quarters," so is a bit more bristly than its companion.  What really sets the two ships apart are their paint jobs, and I'll talk about that after the photos.


Like I said, the two ships are basically identical.  The ship at quarters is at fighting sail, but other than that and the upper stern decoration, they are the same.  In fact, their catalog numbers are NS3 and NS4.  What I find interesting is how much different they look due to the paint job.  The ship with the single yellow stripe appears to be smaller than the other one, even though this isn't so.  Given the side-by-side photos of these two paint schemes, it's easy to see how someone on another ship several miles away, looking through a telescope or the naked eye, might mistake the ship on the right of the photo as being all black.  I tried to take a picture from 15 feet away (3 scale miles), but my current phone camera isn't up to the task, unfortunately.

The single-striper will stand in for the San Justo, as I think she was one of the ships mentioned as being "black" by some British observers.  I remember reading it somewhere, but can't find the source now.  There is, however, a model at the Greenwich museum that support the idea that she was all black.  It comes from a diorama of the battle that was originally built in the 1840's.  The diorama was disassembled in 1978 and all that is left are the model ships.  The models are not on display in the museum, but there are pictures of them on the museum website.  This is the San Justo:

You can find this photo online at: https://collections.rmg.co.uk/collections/objects/539417.html
This was not a standard paint job for the models, as this photo of San Ildefonso shows:

This photo is located at: https://collections.rmg.co.uk/collections/objects/539239.html
Pictures of the diorama taken before its disassembly are at: https://collections.rmg.co.uk/collections/objects/68704.html .  Overall, I'm pretty confident that the paint scheme on my San Justo will pass inspection.

This is the last post for 2019.  When I post the finished Montañes ships we will be in a new decade!  In that post, I'll point out some interesting differences between those ships and these.  Those differences are a cause of some brow furrowing for me where Langton miniatures are concerned.  What is it, you ask?  Well, I will only drop you a hint by saying that Vol Williams already knows what I'm going to talk about. 🤔  Tune in next time!

Monday, December 2, 2019

Ray-o, Ray-ay-ay-o!

The last two posts shared a title, since both of them were about the Texas Broadside convention.  In case you didn't recognize the line, it's from a Jimmy Buffett song entitled, "A Pirate Looks at Forty."  Since my main game was about capturing prizes in the Age of Sail, I thought the lyrics of the chorus fit pretty well:
Yes I am a pirate
Two hundred years too late
The cannons don't thunder, there's nothing to plunder
I'm an over forty victim of fate

  For the title of this post, I've gone a little farther back in time than 1974.  Even with that, for those of us who are "of a certain age," this one should be an easy guess as well.  Just as with the previous title, this one is modified but only very slightly.

Our subject this time is the Spanish 100-gun ship Rayo, which according to Google Translate means "Thunderbolt" or "Lightning" in English.  Yes, I skipped the obvious Bohemian Rhapsody jokes, and yes, you're welcome.  The history of the real ship is pretty interesting, which is why there's a brief history lesson before we get to the usual pictures.

She was originally launched in 1749 as an 80-gun ship of the line named San Pedro, and was commissioned into the Spanish Navy in 1751.  She had the usual spells of activity and idleness during her career, and was laid up from 1798 to 1803.  She was thought to be in poor shape by 1803, but her construction from tropical hardwoods (she was built in Havana) meant that she was still mostly sound.  She was taken and converted into a 100-gun ship in 1803 by enclosing her upper deck, similar to how Santisima Trinidad went from 112 to 136 guns in 1795-96.  By January of 1805, Rayo was in Cadiz.  Later that year, she joined the Combined Fleet after it returned from the West Indies.  She fought at Trafalgar, returned to Cadiz, and sortied again on October 23 to help recover the ships Santa Ana and Neptune.  She was then driven ashore and shipwrecked in the storm following the battle.  She was the oldest ship at the battle, being about 14 years older than HMS Victory.

This particular model turned out to be a learning experience in more ways than one.  Langton has begun casting its larger hulls in resin instead of metal, and this was my first experience working with one.  Overall, the detail is every bit as good as the white metal hulls.  Unfortunately, this model had damage to the starboard quarterdeck bulwark that would have made it impossible to run rigging lines.  It looked like it had been broken instead of not having enough resin in the mold.  Fortunately, I had some .010 plastic sheet, and a couple layers of that, combined with a bit of carving to shape,
made for a fairly quick repair.

It's easy to see the difference between resin and metal detail in this photo.
Also, you can see the repairs to the quarterdeck bulwark.
The sharp-eyed among you have already noticed other pieces of black plastic as well.  Another problem with this hull is that some of the channels for the ratlines seem to be positioned incorrectly.  Instead of ending in line with the hole for the mast, they end before the hole.  Consequently, the brass ratlines should not align properly with the masts.  The next picture will give a better idea of what I mean:


It is kind of a big deal.  As the plan of HMS Serapis below shows, the ratlines have to line up with the mast.


In fairness though, the Spanish 80 gun hull from Langton has the same problem, so I should have expected it.  Unlike the metal hull, this resin one made a repair much easier.  Take a piece of the .010 plastic sheet mentioned earlier, cut to roughly the right size, and glue them on.  I had thought that I might have to support them from below, but once the glue dried they were remarkably sturdy.  I won't say it's a perfect solution, but once paint is applied you can't tell the extensions are there.  I should probably have trimmed the back of the channels to make them a bit smaller, but didn't want to run the risk of damaging them.

Other than that, painting and basing went mostly as expected.  I decided to paint the ship based on some pictures I found on a website called Todo A Babor:  https://www.todoababor.es/  .  If you're interested in the Spanish navy, then put this website in your bookmarks!  There are articles, paintings and information on the Real Armada that I've not seen anywhere else.  There is a definite shortage of English language information sources on the Spanish navy out there, and this is a useful corrective.  The website itself is in Spanish, but Google Translate handles this quite well.  Some of the more specific nautical terms may be mistranslated, but you can still figure out what they mean.  Todo A Babor has a couple of different color paintings of Rayo, but I decided to go with this one:


Another painting shows the ship with the third gun deck painted yellow (which would be in line with regulations), but I decided that I liked the look of this interpretation better.  I decided to drill all the holes after the painting was done, and it was here that I discovered an odd problem.  In a couple of places, the outer layer of paint flaked away from the primer when I drilled the hole.  As you'll see from these photos, it looks like a bad problem:


No need for a circle here; the gray against black is very visible.

All the above photos are at 3X zoom, so obviously these are very small spots that should touch up easily enough.  I mention it only because I've never had it happen to a metal model before.  Also, I prime my ships in black, so I'm not sure why it showed up gray after the paint flaked away.

With the running rigging in place as seen above, the running rigging was going quickly and I was feeling good about finishing this ship quickly.  As I should know by now, that feeling is a prelude to something going wrong.  It started when I cut a line on the running rigging and cut into the knot, so it came loose from the sail.  In taking off the other end of that line, I accidentally cut the main mast standing rigging by mistake.  Annoying, but not disastrous.  While re-running the main mast standing rigging, I realized that the fragments from the old lines were making it impossible to get all the new ones through the hole.  So I decided to enlarge the hole from .5 to .7 millimeters.  After all, what could go wrong?  This could:

AAAAAARRRRRRGGGGGHHHHH!!!!!!
Yes, the bulwark broke into pieces.  Fortunately, I was able to find the largest pieces and glue them back into place.  What I couldn't find I was able to replace with some of that .010 plastic I mentioned before.  I covered everything with super glue gel and waited for it to dry.  What I got was this:


I re-threaded the mainmast rigging very gently, as I wasn't sure about the strength of my repairs.  I wound up having to re-rig the mainmast a third time, as a rough spot on the hole cut the string during the first re-rigggng.  A quick BUT CAREFUL re-drilling of the hole solved that problem and let me re-finish the standing rigging.  After this three hour delay (I told you I was being careful), everything else went off without a hitch.

Well, that's enough grousing and extreme close-ups of ship damage.  Below are the usual beauty shots of the finished vessel:


Obviously the camera angle is a little off on this one.
I assure you, Rayo is not skidding through the sea at an angle!

And since the Quarter of Comparison (TM) hasn't been seen in a while, here's a size comparison shot:


As a closing thought, this ship is also an example of the "check twice, paint once" adage.  If you look at the drawing from the Todo a Babor website, you'll notice that the ship is NOT painted in the Nelson Checker pattern; instead, the gunports are open.  I didn't notice this until after the ship was painted and partially rigged.  I could have gone back and painted her properly, but it would have been fairly difficult.  At that point, I decided it was just too late.

Tuesday, October 22, 2019

Yes I Am (almost) A Pirate, Part II

So after lunch on Friday, I ran my second game of the day.  This time, it was a much more modern game of Save the Whale.  Anyone who has read the blog regularly has seen those models being painted up; now, it was time for them to be used. 

One thing that I think is important for players of the game (and readers of the blog) to understand is that it is NOT a “serious game.”  I mean, the object for one side is to kill a whale, for goodness sakes!  Instead, the game is much more fun when both sides fulfill the stereotypes that are expected of them.  Fortunately, I had a group of players that were more than ready to embrace said stereotypes.  The whalers not only wanted to harpoon a whale; they were bound and determined to do as much damage to the Greenpeace ships as possible.  My Greenpeace players were equally hardcore:  At the beginning of the game one of them said, “We don’t care about casualties and damage.  We ONLY. WANT TO. SAVE. WHALES!”  With that, I knew we were going to have a rollicking game, and we did.

There are no setup rules per se, so we just rolled random locations for everybody (including the whale) and got started.  For whatever reason, there aren’t as many pictures of this scenario as there are of the earlier one.  I didn’t even start taking pictures until several turns into the game, so this time they are going to be of more interesting moments in the game.  The Greenpeace rubber boats rapidly headed towards the factory ship, which decided to use fire hoses to keep them away.  I explained to the factory ship captain that this would give his side negative publicity points, but to his credit he didn’t care.

Damn the publicity, fire hoses away!
He was successful too.  The die next to the boat means that it can’t move for the next 4 turns.  At the same time, Solo decided to get into the action and turned their hoses on one of the harpoon boats:


"Well, if they can do it. . . "


The brown thing behind Solo is a mooring line.  Ships can drag those behind them to try and foul their opponent’s propellers, but if they roll a 1 on a D6 the line breaks and is lost.  This mooring line is probably in the Greenpeace museum, as the player kept it for the entire game, even after fouling one ship.  The harpoon ship Solo snared was  so badly fouled that with other damage it was down to only one knot of speed.  The players agreed to give him some speed back, as he was out of play otherwise.  He also tried to foul the factory ship but was unsuccessful.

"Somebody's getting a taste of this rope.  Oh, guess it's you."
The one rubber boat swamped by the factory ship wound up not mattering much, as the rest of them swarmed the factory ship and got out the spray paint.  Both of them passed their die rolls, although not on the same turn, and applied slogans to the side of the factory ship.  Fortunately for the whalers, only two slogans counted for publicity points, and the boats ran off to interfere with the harpoon ships after that.

Like fleas on a dog. . . .

"The different colors of paint make it ART, not GRAFFITI!"
The  captain of the factory ship decided to use his ship as a sort of mobile battering ram, trying to force a collision with any Greenpeace vessel he could get close to.  He was remarkably successful in this, giving damage to both protest ships and reducing Rainbow Warrior to no speed by the end of the game. 
Despite all their aggression (and attendant negative publicity) the whalers did not succeed in killing a whale, so the protesters won this game.  Given the laughter around the table for the great majority of the game, I’m going to assume that everyone had a good time.  That ended Friday for me.

On Saturday, I had a chance to play some games, so I took advantage of that.  The first one was a game called Conn, Sonar!  This is a beer and pretzels modern submarine game, and the scenario was the final battle from Hunt for Red October.  Yours truly got to drive the Alfa class sub looking to kill Red October.
1/700 scale subs are oversize, but sure look good.
 The core mechanic of the game is getting a fire control solution on your target.  Every time you are successful using passive or active sonar, you get a solution counter for your target.  Once you have three, you can fire.  You can also try to take back your markers from others by being quiet.  I had an intermittent solution on the US sub, but could get nothing on Red October, as her commander kept extra quiet by using the caterpillar drive.  Fortunately, the Dallas couldn’t fire until he was fired on.
Once I realized that I couldn’t find Red October by being stealthy, I filled the water with active sonar waves.  I finally got a solution and fired two torpedoes before I lost him again.

Things are starting to get a bit crowded.
This is where things REALLY got interesting!  Of my two torps, one did not acquire, and began a circle to the right.  The other acquired Red October but missed her.  Going past the ship, it acquired and began to track Dallas.  That fulfilled her Rules of Engagement, so now she could start shooting back.

"Sorry about accidentally starting WWIII, guys." 

My first torpedo then acquired ME, so I decided it was time to leave the area at full speed.  Dallas turned in front of Red October and fired two torpedoes that had no trouble acquiring me, given the noise I was putting out at 40+ knots.  However, my second torpedo switched from the US sub to the larger target and hit Red October.  Good news for me!  However, a target that large requires two hits to be destroyed.  Bad news for me!

"So, do you want the good news, or the bad news?"

After a turn or so of running like mad, this is my situation:


"Looks like we made someone mad."
As my quarry was only damaged, I decided to try and get out of the torpedo’s seeker heads, and head back towards the (now damaged) missile sub.  They turned tighter than me though, so I wound up taking two USN Mk-48 torpedoes in the side and one was enough to kill me.  Game over.  Being a movie game, the movie quotes were flying around throughout the game.  Among them:

“We’re going to kill a friend, Vasily.”
“Set safeties to zero.”
“You fool, you’ve killed US,” and finally
“You mean you have TWO subs missing in the North Atlantic?”

Overall, they’re a fun set of rules that let us play a game of 19 turns to conclusion in under 2 to 2 1/2 hours, which included explaining the rules.  It manages to capture the feel of submarine combat, or at least what we think it’s supposed to feel like 🤔.

The last game of the day was Check Your 6! Jet Age.  This was another movie game and was actually two scenarios in one session.  To teach everyone the basic movement and combat rules, we did a scenario from the movie Top Gun of students versus instructors.  So, it was F-14's against A-4 Skyhawks with guns but no missiles.  After everyone understood the rules, we reset the game.  This time though, it was the final battle from Top Gun.  You know the one:  “Somewhere in the Indian Ocean.  Present day.”  And yes, we even had the dreaded MiG-28's.  They have missiles and afterburners, so are a much more even fight for the Americans.  The picture below is just after the merge:

Yes, there's an F-18 in the game.  Didn't bother the players, so don't
let it bother you.
THIS time though, the forces of Somewhereastan got their teeth into the Americans invading their airspace.

That is a dead Tomcat.  Note that there's no parachutes, either.
We played a few more turns, but weren't able to complete the game, as we were running out of time.  The end of the game looked like this:

Note that the other Tomcat is smoking.  Black smoke indicates engine damage
and orange indicates afterburner use.
With one F-14 shot down and another damaged, the forces of the People's Democratic Republic of Somewhereastan immediately declared victory.  The funny thing in this game were not the movie quotes (although there were a few), but this:

Remember me?

Yes, the Broadside! token that I mentioned in the first post.  Apparently it is the official currency of Somewhereastan, as over 20 of them were used during the game with the great majority being played by the Commie pilots.  I think at one point we were accused of flying this mission straight from the strip club, due to all the tokens we used!  The money used to purchase them goes to the Battleship Texas though, so it's worth it.  After this game slot, we had our convention speaker and then retired to the traditional after convention dinner.  There were other games played during the two days, but I didn't get any pictures of them.  Whether this is due to being busy, or being lazy, I will leave up to the readers to decide.

Wednesday, October 16, 2019

Yes I Am (almost) A Pirate, Part I

Clearly, the title for that British 74 post came from Pink Floyd's song Another Brick in the Wall.    Since there are three parts to that song on the album, I guess you can choose for yourself which one it's from.  Personally, I'm more inclined towards part I than the more famous part II but that's just me.  This post title is a song from one of my favorite artists for many years (no, not Warren Zevon) and also describes the events of the day I'm writing about quite well.

Since it's October, that means it's time for another Broadsides! convention.  This year though, because of changes in the management of the Battleship Texas, we had to find another place for the convention at the last minute.  Fortunately, the convention organizer found another venue that is almost as good as the battleship:  The Houston Maritime Museum.


It is a small, but very nice facility and their website is: https://houstonmaritime.org/ .  Unfortunately, I did not take any pictures of their exhibits as I was busy running and playing games.  If, however, you are in Houston I recommend taking the time to visit.  They have a 1/48 scale model of HMS Victory that is so nice that I wondered if I could sneak it out under my shirt!  No, I didn't try. 🙄  What I will try is to go back and get some pictures, even if they are only of her.

Since the convention was starting over in a new location, I decided to revisit the scenario I ran from the very first Broadsides; a scenario I call "Jamaica Mistake."  It is a what-if scenario based on the idea that, instead of missing the Jamaica Convoy in the fog during the War of 1812, John Rodgers and his US Navy squadron find a section of the convoy.  All players are on the US side, and the object is to be the player with the largest amount of prize money when the scenario is over.  There are British escorts but they don't show up until after someone starts shooting.  Even then, the actual ship and its entry point are randomized so that I (playing the British) don't know exactly what I will get.

Since the scenario starts with a visibility range of 200 yards (6 inches), there are no ships on the table.  Instead, there are blinds that may or may not be a merchantman and the US entry is randomized for each ship entering on the table edge.  

Not as pretty as I'd originally hoped.
The idea was that each of those black rectangles would be wooden blocks, painted gray, with a discreet number on the back so I could match them to ships.  Well, since I waited till the last night to make them, my mini table-saw blade gave out.  I then discovered that I couldn't cut a straight line with a Dremel tool attachment.  Consequently, I got some craft foam out of the closet and used that.  
Not every one of those squares is a ship; in fact, only about half of them are.  The rest are shadows in the fog, false sightings and the like.  The only way for players to tell was to get within visibility range and actually see what is there.  To make things more fun, the visibility can change every turn.  In the Post Captain rules, you roll a D12 every turn and that is the visibility in yards.

There were only two players, so they drew their ships at random.  One player drew USS President and came in from the top short edge of the table.  The other drew USS Argus and came in from the opposite short edge.  

President from one short edge

Argus from the other
The first couple of phases (remember: for Post Captain there are three one-minute phases in a turn) were not good for either US player.  They discovered that some of the blinds were just empty ocean.  By the end of the blue phase though, they had started finding some targets.

Merchantman: "Oh.  Uh, hello."
I'm blaming any blurry photos on the "fog".  Yeah, that's it. . . .

Luckily for the Americans, the visibility went from 200 yards (6 inches) to 800 yards (24 inches) at the end of the turn.  This made everything but the center of the table visible, and let the commander of President realize that the entire convoy was coming right at him.

The fog begins to lift.
As the game sped up, my picture taking began to be a bit more erratic.  Everything that came within range of President decided that surrender was the wisest option, but the ship that Hornet sighted decided to try and run.  A single broadside from Argus was enough to make that merchant change her mind, but it also let the escorts know that something was wrong.  I rolled, and it would take one of the escorts three turns to reach the table.  Argus' merchantman had decided to surrender, but once the US captain saw the other ships ahead of him he simply sailed right past heading for the other prizes.

We wound up calling this a "naval drive-by."

At the end of this turn, another player came by a put down a Broadside Token. 


If a player puts one down, it lets him redo a die roll, or force another player to re-roll their dice.  If an onlooker puts one down, the game master has to modify something on the next turn.  As I was going crazy trying to keep my makeshift blinds associated with the right ships, I decided that next turn the fog would lift and everything on the table could be seen.


Over the next three turns, Argus kept chasing ships while President had so many surrendered ships around here that there was a bit of a traffic jam. 


In fact, President was in danger of running out of ship's boats.

"You bring that BACK when you're done, Midshipman,"
It was at this point that the Royal Navy finally put in an appearance.  The convoy was escorted by a 64, a 38 frigate and a brig.  My random die roll brought on the frigate, HMS Thalia.  Unfortunately for the Americans, she showed up behind President.  A third player joined in at this point, and wanted to run the British frigate, so I let him do it.

The watchdog arrives.
In our eagerness to start the real fighting, I didn't take any more photos.  Thalia got off a broadside before President could bring her guns to bear, and caused a rudder critical hit.  President  did manage to get turned though, and the two frigates had just settled down to pounding each other when we ran out of time.  All the players enjoyed themselves and said they would play the rules again, so I consider that a successful game.

I had planned on covering the entire convention in one post, but looking at the length of this one battle report makes it clear that I can't pull it off.  So, I'll talk about the rest of the games I played as part II.

Friday, September 13, 2019

Another Brick in the (Wooden) Wall

The title for the previous post is from the song "Workin' for a Livin'" by Huey Lewis and the News.  After I made the post, I looked the song up and discovered it was primarily a US hit instead of an international one.  So, apologies to any international readers I shortchanged.  Consequently, the musical reference in this title is so easy, I wouldn't even bother to give out a hint (well, if I gave out hints, which I haven't yet).  Let's just presume everyone got it, and move on.  Of course, for that one person who doesn't know the tune this title is riffing on, I will name it at the beginning of the next post. 😣

For the ship itself, there's not a lot to say really.  She's another British 74, of the Middling persuasion.  That means she measures between 173-175 feet on the gundeck, and normally carries 28 18-pounders on her upper gundeck.  This miniature will be representing one of the five Middling class vessels at Trafalgar.  I decided to paint her as a ship that is fresh out of the dockyard: whitish sails, no additional coloring or decoration other than stock.  My thought here is that perhaps her commander doesn't have a lot of extra money to spend on flashy decorations.  So, much like Captain Hardy in Victory, our fictional captain here took what he was given.


I haven't posted a picture with the Quarter of Comparison (TM) in a while.
The next few sailing ships up on the blog are going to be Spanish ones.  I recently made an order from Waterloo Minis (http://waterloominis.com/) that will allow me to finish my Spanish fleet for the Trafalgar Project.  If you're in the US or Canada and need to buy Langton miniatures, Waterloo is definitely the place.  Jeff is a great guy to deal with; if he has it in stock you'll get it, and if he doesn't he will let you know.  I trust him enough that when I order masts and sails, I'll tell him "I don't want X or Y, but any other setting is fine."  Given how finicky I am about my ships, that is high praise indeed!