Saturday, December 30, 2017

2017 Shipyard report

With the end of 2017 upon us, it's time to take a look back at what was built this year.  This report only applies to the sailing ships, as I don't keep detailed records about my other projects.  My sailing ships, however, I keep in a spreadsheet.  I've done this since 2014, and consistently since 2015.  No, it's not a mental disorder.  This is how I can tell where I am  regarding the Trafalgar Project, and what I need to buy next.  (That's MY story anyway, and I'm sticking with it.)

At the beginning of the year, there were 94 ships in the collection, and they broke down as follows:

  • 21 x British
  • 21 x French
  •   9 x Spanish
  •   4 x Russian
  •   4 x US
  •   2 x Dutch
  • 18 x minor warships (brigs, schooners, gunboats, etc.), and
  • 15 x merchantmen
As 2017 ends, there are now 101 ships in the fleet, and they are:
  • 24 x British
  • 21 x French
  • 12 x Spanish
  •   4 x Russian
  •   4 x US
  •   2 x Dutch
  • 19 x minor warships, and 
  • 15 x merchantmen
At this point, I can see the end of the Trafalgar Project.  I need to assemble 10 more British ships, 8 French and 4 more Spanish ships, for a total of 22.  It sounds like a lot, but that includes every frigate and unrated vessel present at the battle.  If I focus on just ships of the line, then that cuts it down to 9 British, 5 French and 4 Spanish ships, for a total of 18 ships.   Hmmmm, maybe the end isn't as close as I first thought....

"But wait!" I hear you saying.  "Couldn't you use those other country's ships you have to make up some of the numbers?"  My response to that is, "Eh, not really."  The whole idea behind the Trafalgar Project was to refight the battle with the correct models of the ships involved.  The other nation's warships I have won't really do much to fill in for the ships I need.  It's a good idea, but one that has already been looked at and passed over.

But this post is about the past, not what's coming up in the future.  So, let's take a last look at what joined the fleet in 2017

A Spanish Montañés  class 74 with her teeth bared. Built between 10/02/16 and 2/23/17,
so before the blog was started.
A small galley, built for a possible Barbary Pirates campaign.  Also built before the
blog was started.
Another Montañés class 74, but in a bit more of
a hurry than the other one. Built in March of 2017.

A generic Spanish 74, but painted after Pocock's painting of San Nicolas at
Cape Saint Vincent in 1797. Built between March and May, 2017.
HMS Agamemnon, Nelson's favorite ship.  Built between May and July of 2017.

HMS Britannia, one of the three 100 gun ships at Trafalgar.  Built between July and August, 2017.

Finally, the British 36 gun frigate that starred in the "What Is My Time Worth" series of blog posts. Built (slowly)
between August and December 2017.

Thursday, December 28, 2017

What Is My Time Worth Part 7: Final Analysis and Thoughts

So, it's taken a while to go from this:

The actual hull number is NB16. I didn't think to take a picture of the original packages.


to this:

Now, with the project finished, it's time to take a look at the numbers.  How long did it take?  What would it cost me to buy one pre-assembled?  And, finally, what is my time worth?

So, How Long Did It Take?

In looking at the build time for this project, we can break it down into four parts: Hull, Masts, Standing Rigging and Running Rigging.  So, let's look at the parts of the project in that order.  

The Hull:

To get the hull put together, cleaned up and make sure the masts would fit into the holes in the hull took 50 minutes.  I decided that the guns were a little too high above the water on this model, so I decided to grind the waterline down to the proper height.  To measure that and get it ground down took about 12 minutes.  This isn't normally a step I would take, but in this case I decided to do so as I thought it was too far out of line.  These times were minor compared to painting the hull of course, which took just a touch over 3 hours, or 185 minutes.  The total time in getting the hull ready was a total of 247 minutes, or 4.12 hours

The Masts (Including the bowsprit):

It only took 22 minutes to clean and assemble the masts.  Once again, painting was the main amount of time here, which took 152 minutes or 2.53 hours.  Because I made sure the masts would fit into the hull before assembly started, it took only 6 minutes to install all the masts including the bowsprit.  When all the times for the masts were totaled up, it took exactly 180 minutes, or 3 hours.

Standing Rigging:

Including drilling all the holes for the rigging, it took 106 minutes to install the stays between the masts.  It took 48 minutes to paint and install the photo-etch ratlines. To do the backstays for all three masts took 88 minutes, and it took 29 minutes just to put the rigging around the outside of the bowsprit.  When added together, the entire set of standing rigging took 261 minutes, or 4.35 hours.

Running Rigging:

Surprisingly enough, this turned out to be the quickest part of the whole project, which I did not expect.  To do all the running rigging took 106 minutes, or 1.76 hours.

Totals and Grand Total:


  1. Hull:                                    247 minutes/4.12 hours
  2. Masts:                                 180 minutes/3.00 hours
  3. Standing Rigging:              261 minutes/4.35 hours
  4. Running Rigging:              106 minutes/1.76 hours
          GRAND TOTAL:            794 minutes/13.23 hours

What Would It Cost To Buy One Prebuilt?

For purposes of this comparison, I'm using the prices found at the Model J Ship website (http://modeljship.com/en/).  The basic cost from the website of a ship like I just built would be 60 Euros.  Julian (the website owner) charges 15.00 Euros for a base, but he hand-sculpts his and I don't do that any more so I don't think the comparison there is fair.  He also offers an accessories kit for 25 Euros that includes anchors, towed boats and flags, but I didn't build my ship with any of these.  Consequently, the best comparison from the website is the basic model.  Using the XE.com exchange rate website, 60 Euros equals $71.39 US.  So, $71.39 is the amount I will use to determine the answer for the next section.

What Is My Time Worth?

So, now we've come to the big reveal and it's just a question of simple math.  Take the cost of $71.39 and divide it by 13.23 hours.  That gives us a total of:

$5.39 per hour

Hmmmmm.  Well, it's a little more than what I expected, since I originally expected it to be about $3 something an hour.  When I started this series in August of 2017, the same frigate from Model J Ship would have cost 73 Euros, or $85.96 US although that includes a base.  If I had included a base in the price above, it would have still been 73 Euros, but $86.86 US due to the different exchange rates over time.

What Does It All Mean?

My first thought here is that it means no one is getting rich in the model shipyard business!  For other meanings, I have to go back to some of the comments on the very first post in this series.  One comment said that he suspected the final analysis would show that while commercial prices seemed high, they might turn out to be a pretty good deal on a per-hour basis.  I would have to agree with this.  Also, I said in response to another comment that the last entry in this series would probably have a disclaimer about how we build these for love, not money.  That seems true too, so let me repeat it in a larger font:

WE BUILD THESE FOR LOVE, NOT MONEY!

For a closing thought (OK, thoughts), I think that Age of Sail gamers are different from other wargamers.  First of all, we realize that we are a niche within a niche within a niche [war-gaming > Naval war-gaming > Age of Sail naval war-gaming].  Secondly, we all seem to have read Horatio Hornblower or Jack Aubrey novels at some point in our lives, and identify with them somehow.  Something about the gentility of the period appeals to us; you don't seem to find the "win at all costs" mentality among serious Age of Sail gamers.  

I game in other periods, of course.  Rare is the wargamer that doesn't dabble in several periods of history.  I can tell you though, that my WWII Soviet infantry doesn't evoke the same feelings for me that my sailing ships do.  If I lost all my other miniatures but kept my sailing ships, I would keep playing.  If I lost my sailing ships, I would probably be out of the hobby altogether, as it would be too hard to start over.

In a way, my miniature sailing ships are a lot like real ships: They're labor-intensive, they cost a lot of time and money, and you can never get back what you put into them.  Another way they are just like real ships is this:  Once they get into your soul, you can't just walk away from them.

Wednesday, December 27, 2017

What Is My Time Worth, Part 6: Running Rigging

I had planned to have this post in place before Christmas, but there were two things I didn't plan on.  They are:

  1. General holiday season craziness, and
  2. A bout with the flu.
I should have known that the holiday season would mess up my schedule; after all, it's not my first Yuletide season.  I am, however, going to plead ignorance about the flu as I really didn't expect to get sick.  I certainly didn't expect it to turn a week of my time into a blur of sleep, coughing and fatigue.  That's enough about my issues though, as I suspect you're here to read about sailing ships and not sickness.

In this post, I'm going to deal with running rigging.  That's the rigging that, in real life, operates the yardarms and other parts of the sail set.  These lines were not coated with tar, because they had to move through blocks in order to operate properly.  This is whey they are called "running rigging."  On my models, they are done with a light tan thread so as to differentiate them from the standing rigging.  Unlike the standing rigging, when doing running rigging we start at the bow of the ship and work our way towards the stern.    Another difference is that, unlike standing rigging, the number of steps in doing running rigging will vary based on which sails your ship has set.  So, while the Langton rigging guide shows 16 basic steps for running rigging (plus more if the model has its staysails set between the masts), some of those 16 basic steps will be ignored as we go. 
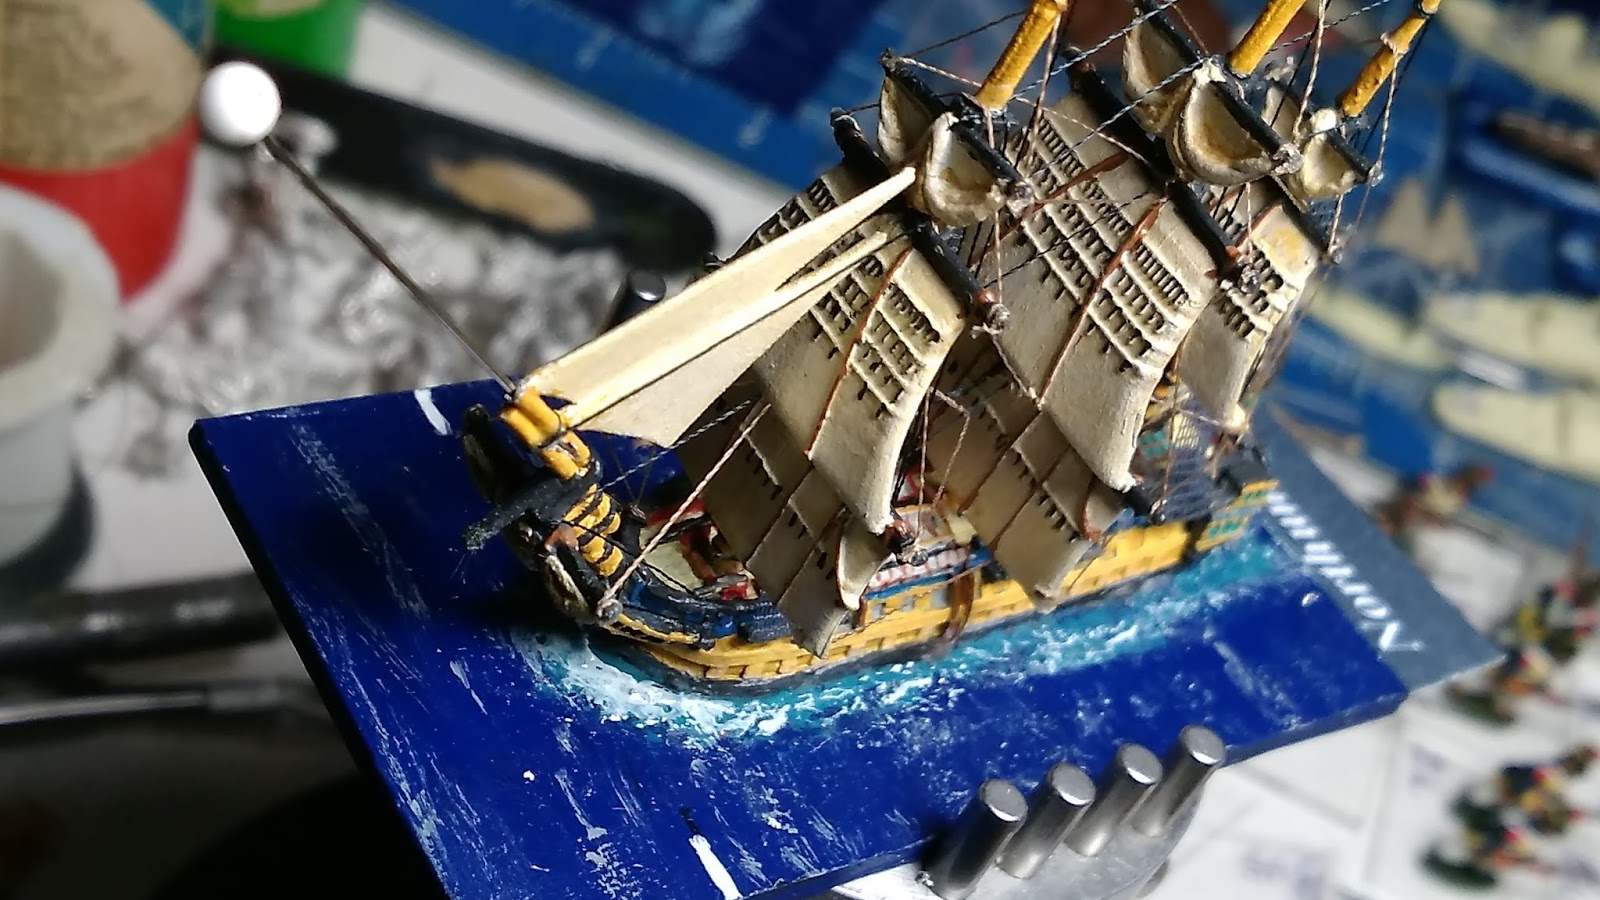
So, from this...


to this in only 16 steps or less.
One other picture that should have been included in the previous post, but wasn't.  The picture below is a homemade tool I use to get glue onto knots in tight spaces.  In practice, I use it almost everywhere, given that the nozzle on a container of glue is way too big to get into small spaces.


It's just a pin vise with a straight pin that has a large head chucked into the larger of the two openings.  It is so useful that I'm tempted to buy a new vise, and convert this one into a permanent tool for gluing knots.

Before starting, I should point out that the running rigging on this model is considerably simpler than the standing rigging.  As the Langton guide points out:

we are only showing the lifts, braces and sheets of the running rigging.
Lifts were the lines from the mast down to the yard arms. Braces were
taken from the yardarms to the next mast in order to be able to trim the
sails to the wind.  Sheets were used to haul on the lower part of the sail.

The first step is to run a line from the foremast stay to each side of the spritsail yard below the bowsprit.  In Harland's book Seamanship in the Age of Sail this line is called a spritsail brace.  I refer to it as "another line to keep the spritsail yard in place if the glue breaks," but then I'm not as precise as Harland.  
So that's the first step....
Step 2 involves the sheets for the jibsails, which are those triangular sails out over the bowsprit.  According to the guide, you should use a separate line for each of the jibsails, but I find this to be too fiddly given the small area you're working in.  What I do is to drill a hole in the rearmost jibsail, tie the line there, run it back to the hole where the shrouds are, take a turn and then glue the end of the thread under the second jibsail.

The highlighted lines run inside the line from step 1, and behind the ratlines.
The next photo covers steps 3,4 and 5, and will have us installing the braces and lifts for all of the foremast.  Here, we start from the lowest line and work our way towards the top of the mast.  Step 3 is highlighted in blue, step 4 in green and step 5 in red.  As you can see, each thread provides both the brace from the main mast to the foremast, and the lift for the yard.

Despite what the picture looks like, the lines do not foul each other.
With this sail set, we skip steps 6 and 7.  That's because there is no royal sail at the top of the mast for step 6, and with the foresail brailed up there is no need for a line to the bottom edge of the foresail.

There are different versions of step 8, depending on whether or not the mainsail is lowered or furled. Either way, step 8 is the most time-consuming step of all for running rigging.  I've tried to color-code the picture below in such a way as to let you see the different sub-assemblies of step 8.  Keep in mind that, even though I've used different colors, this is all one long piece of thread.  You start by tying the thread onto the main yardarm, and then taking it back to hole A (dark blue).  You go through hole A, wrap around the bottom boom of the spanker sail, go up the sail and under the ratlines, go over the crossjack boom and then do the same thing on the other side of the sail (teal blue).  Then, go through hole A on the port side and back up to the top boom of the spanker sail.  Take a turn around the top boom, then take the line up through the gap in the standing rigging and back down to the upper boom of the spanker where you take another turn (light blue).  From there, go back down to and through hole A on the starboard side (light blue).  From hole A, go back up to the top of the spanker boom, take a turn and go down and through hole A on the port side (pastel purple).  From hole A on the port side, to up to the port mainyard and wrap the thread around it (dark blue again, on the port side).  From there, take the line over the topgallant yardarm, back down to the yardarm on the starboard side, tie off and glue it (dark green).  Trim off any excess once you're done.

Sorry, but I don't think I can make it any simpler than this.

Step 9 is ignored because the main sail is furled, so the next picture shows us steps 10, 11 and 13.  We ignore step 12 for the same reason as step 6: i.e., there is no royal sail on the mainmast.  For the sake of consistency, I've colored the steps in this photo the same way I did the photo for 3 through 5.  This set of steps is a little different, because here we start in the middle, move to the top,and then drop back to the bottom for step 13.  When you look at the model in person, though, this makes sense, because you do the interior lines first and then go back to the crojack line which is outside of the other two.

Light blue first, then green, then red.
The green line in the above photo should be back against the mast like all the other braces, so that's a mistake on my part.  I suspect I didn't let the glue on the knot dry enough before I started running the lines.

Now, we're in the homestretch as there are only 3 steps left.  We can ignore step 16 though, as there are no royal sails on the mizzenmast.  In these last two steps however, are the major differences between British warships and every other nation's vessels.  British warships (and warships only) ran the running rigging for their mizzen sails back to the top of the spanker boom.  Every other nationality ran these lines forward to the main mast.

British mizzen rigging.

 
Everyone else's mizzen rigging, including British merchants.
With the mizzen rigging finished, the ship is now complete.  Total time for the running rigging was 106 minutes, or 1.76 hours.

There are still some little things, like finishing the ship's base. However, as  I make my own bases and buy the material in bulk, there is no way to directly compare them to buying and painting a resin one.  Because of that, I won't be including the time or cost of the base in the project.  I had also wanted to make this the final post, but given how long it already is I think I'll save the final analysis for one more post.

Monday, December 11, 2017

I Guess This Civil War Thing Is Gonna Happen....

No, this is NOT a post on the current state of U.S. Politics.  Instead, it's about another naval project that is slowly starting to pick up steam (yes, pun intended).

Back in March, I did a post entitled, "Getting My Hands Dirty?" that talked about the 1/1200 scale ironclads I had bought from Thoroughbred Miniatures.  Since then, I've bought quite a few ships from Pithead Miniatures in England and just made another order from Thoroughbred a few days ago.  Instead of taking a scattershot approach like I did with the sailing ships, I've decided to concentrate on the Mississippi River campaign.  The main reason for this is that I have the Anaconda campaign rules by Ray Garbee that focus on the Mississippi River.  That, combined with the fact that our gaming group thought that an ACW river campaign would be fun made my decision in that regard pretty easy.

There have been a couple of changes from the March post.  Now, rivers are going to be dark blue.  As I also haven't really found a river mat I like (or that looks like the Mississippi River), using my blue mats will save some money.  Also, my idea for clear bases won't work because there's no way to apply magnets to the base for storage without them being visible.

The Anaconda rules themselves are available from Wargame Vault, and give the players/gamemaster plenty of room for tinkering.  As they say on the cover (see below), they are a campaign rules set.  That means you will have to provide your own ships and rules for resolving combat.


When it comes to providing your own ships, there are several options out there for 1/1200 scale.  Thoroughbred Miniatures has a small but growing line in 1/1200 that is every bit as nice as their 1/600 products.  Navwar and Red Eagle (formerly Skytrex) have ACW lines, but tend to focus mostly on ironclads.  Stone Mountain here in the US has the old Houston's Ships line, but they are probably closer to 1/1000 than 1/1200.  It seems that if you want the full panoply of oddball vessels turned into warships, then you need to take a look at Pithead Miniatures.  They do a number of different ships organized by area, so if you want something like the Confederate ships that defended Island No. 10, then Phil at Pithead can set you up.  The ships are cast in resin with metal parts and some of them can be quite small, so I would suggest basing them.  I think the Pithead masters are all carved by hand, so if you like miniatures with all perfectly straight lines, then you may not like them.  To me, though, the Pithead models wonderfully depict the sort of ramshackle, make-do character of both sides' navies during the Civil War.  In fact, every time I look at them compared to my sailing ships, I keep thinking, "what grubby little vessels!"  Don't just take my word for it though; here's a picture of the different types of ships side by side.


Another thing about the ACW naval miniatures is that they don't require much, if any rigging.  That, combined with the generally simple paint jobs means you can pick up quite a few and (hopefully) finish them quickly.  Otherwise, you wind up with a traffic jam in the shipyard that looks like this:

There are a couple of others I haven't put together yet.
I'm thinking that as I start getting these painted, I might start a separate page on the blog with just the ACW stuff.  I will also add some info about the ship combat rules I want to use in another post.

Wednesday, November 29, 2017

What Is My Time Worth, Part 5: Standing Rigging

So with the masts in place, it's time to start doing the rigging.  This is the area where most gamers start saying things like, "Oh, I can't do that."  Truth be told, looking at a finished model without seeing how it was done can be a little intimidating.  There are, however, several guides available to the modeler that will walk them through the process.  Some of them are online, and a good one is at my buddy Vol's blog: http://volsminiatures.blogspot.com/ .  Look for "Rory's rigging guide", as it is in several entries, and some can be purchased.  Personally, I use Rod Langton's guide, which is pictured below:


They now cost $22 from Waterloo Miniatures here in the US,
but to me it's been worth every penny.

I will try to follow the rigging instructions step by step, as they are outlined in the manual.  That is probably the quickest way to see how we go from this:

Nice enough, but naked.

to this:
Now, she is starting to look like a sailing ship.


The first step is drilling the holes that will let us run the rigging.  Normally I would do this before the hull was painted, but decided to wait on this ship so that all the steps would be in a logical order.  If  you do this, you will have to touch up paint on the hull and possibly the deck when the drill bit goes through and scratches your work.  The picture below is from the rigging guide, and shows where the holes need to be:


Holes A, B and C are each .5 millimeters with hole D being .7 millimeters, but I drill A with a .7 millimeter drill bit as well.  That's because there will also be running rigging going through that hole.  You'll also see a handwritten note about an extra hole near the bow.  That's so the bowsprit can be rigged.  It's mentioned in the book, but not shown on the reference sheet.  There is also a .7 millimeter hole at E, which I should have mentioned in Part 4 but apparently didn't.  To give you an idea of how small these drill bits are, here's a picture of them:

.5mm on left, .7mm center.  The big one on the right is 1/16 of an inch.
I get my small bits from Micromark. https://www.micromark.com/


  1. Here, we drill the holes at A, B, C and the one I have written in.
  2. Next comes the .7mm hole at D.  The manual also says to drill the hole at E here, but I do that before the masts are installed.To drill the nine holes in the hull took me about 23 minutes, including touching up the paint where needed.  Next comes the stays, or the lines that run between the masts.
  3. This runs from the bowsprit, around the left side of the foremast, over the main yardarm and through the hole drilled there earlier.  In the photos below, it's highlighted in orange and took 23 minutes to complete.  
  4. This line runs from the foremast, over the main yardarm and through the hole where it's tied to the larger string.  It's highlighted in bright green. 
  5. The gammoning of the bowsprit comes next, and it's done in purple.  This helps hold the bowsprit in place on the real ship, and does the same thing here by keeping it from bending up.  It's hard to see in the photo, but it's done in a figure 8 shape that also runs lines out to the spritsail yard.
  6. After all that, the next line is pretty simple.  It runs from the mainmast over the crojack yard and secures the mizzenmast.  You'll see it in bright yellow.  Steps 4-6 took 44 minutes total.
  7. Finally (for these threads) is what the manual calls "a long length of thread and it finishes off the lower stays.   It runs all over the ship, and you'll see it highlighted in pale blue.  It took 27 minutes to install.  The total for standing rigging to this point: 106 minutes, or 1.76 hours.
Highlighted lines are explained above.
Next up are the ratlines, and this is where I do things a bit differently from the Langton manual.  When it was written, When my copy was written, there were no photo-etched brass ratlines, with a mesh being used instead.  The manual recommends those mesh ones be put in after all the standing rigging is in place.  I find that's too hard to do with the brass ones, so I install them before I install the backstays.  They come in unpainted brass (as seen below), and I simply spray paint them black and then seal them with a spray of dullcoat.  After that's done, I cut them from the sprue, touch them up with a black Sharpie, and install them.  It's never an exact fit; you have to cut some off of the top to ensure that the bottom sits on the channels like they're supposed to.  It took 28 minutes to install the six lower ratlines, and 17 minutes to install the six upper ones.  It takes less than 5 minutes to paint and seal them, so I called it 3 to make this step an even 48 minutes.

I'm pretty sure this picture is larger than life-size.
After this is done, it's now time to do the backstays and remaining stays.  The manual says to start from the mizzenmast and work your way forward.  This makes senses, because it gives you more free space to work in.  You take another "long length of thread," and run it up and down the mast three times to give you the backstays.  After you tie that off to the mast, you use the remainder to make the other stays running towards the bowsprit.  I've tried to use different colors to show how the lines go up and down, but may not have been too successful.  Anyway, the times for each mast are:

      8.   Mizzenmast: 35 minutes
      9.   Mainmast:    28 minutes
      10. Foremast:     25 minutes

Lines from earlier steps have been erased (although not very well).

And that gives us a total of 88 minutes for the backstays.  Now, we're almost done with the standing rigging, with all that's left to do being rig the bowsprit.  Rather than take another picture of the ship and having to erase more lines, I'm going to be lazy and use a view from the manual.  


   11.  This is one line, tied in the center at X, then run in numerical order (number 2 are the holes we drilled back in step one) and tied off under the bowsprit at 3.  Time for finishing this line was 19 minutes. 

Total time for doing all of the standing rigging was 261 minutes, which works out to 4.35 hours.  When combined with the other times I've recorded so far, this gives us a total of 11 hours and 28 minutes, which we can round to 11 1/2 hours.  In the next "What Is My Time Worth" post, I will do the running rigging and bring this project to an end.


Tuesday, November 28, 2017

Refitting and Repairs

One of the things AOS gamers have to realize is that, if we take our ships out and let people play with them, they are going to get damaged.  I should emphasize at the beginning that this is not something they are doing on purpose.  (OK, that one guy joked about it one time, but it was probably a joke even if I didn't take it that way. Besides, that is a story for another time.)  Instead, it's just the nature of the beast: our 1/1200 scale models are more fragile than regular miniature soldiers.

It used to bother me more than it does now.  What changed my attitude, you might ask? The simple answer is: research.  We like to think of sailing ships as machines that could go around the world, only stopping to resupply the crew and that is partially true.  What else is true is that the real-life ships required maintenance on a pretty regular basis beyond what the crew could provide.  Without getting into too much detail, repairs could range from a "refit," which meant only working on the rigging, to a "great repair" which could go so far as taking a ship apart and lengthening it as was done with the 98-gun Prince.  Even without these, a ship could expect to visit a dockyard about once every two years just to replace copper plates along the bottom.  So, with that in mind we probably shouldn't complain about a little repair work now and again.

The two candidates for a refit after Millenniumcon were Cassard and Northumberland; not coincidentally I suspect, those two also saw the most use over the weekend.  The repair on Cassard was the simplest, with a single line on the bowsprit broken.  I didn't take any pictures of the repair because, to be honest, there wasn't any need.  Cut away the broken line, glue another one in its place and that's that.  If you've built any model sailing ships, you could do this repair.

Northumberland had a bit bigger problem, although in the same neighborhood.  Somehow, the last 3-4 millimeters of the bowsprit managed to get broken off, even though it was still glued to the rigging.

How did this happen, you ask? I have no idea, so I'm blaming the
little lead Captain for following too close.
At first I thought I could take the easy way and just glue everything back together.    Of course, I should have known better and that didn't work.  So, out came the little drill bits, and I bored the usual hole in the end of the bowsprit.  After that, I fitted a straight pin into the hole to make sure it would fit.

Have you thought about leaving it like this, you ask?
Yes, yes I have.
Then, I measured the pin and cut it to roughly the right length with some snips.  After gluing it in place, I cut it a bit closer to the correct length and cut away some of the rigging that would need to be replaced.  That happened because I couldn't hold the old rigging in place and fit the pin, and the rigging wouldn't stretch enough to go over the new piece.  Also, the old rigging would not be as taut as I like.

Not looking too great here, but...

Slap a little paint on it, and it's not too bad.
After that, it's just a case of re-running the lines I had to cut away, and she's finished.

Ready to rejoin the fleet!
If there's a moral to this post, I guess that it's don't be afraid to let your toys out into the wild.  If you had the patience to build them, you can definitely repair them.  To revamp/slaughter an old adage:

"Your miniature ships in storage are safe,
 but that's not what your miniature ships are for."

Sunday, November 19, 2017

A Brief Interlude 3: A New(ish) Portrait of Nelson

According to Smithsonian.com, a portrait of Lord Nelson has recently been rediscovered.  What's significant is that this 1799 portrait by an Italian artist shows Nelson's wound from the Nile, instead of ignoring it.  Apparently this painting had the 19th Century equivalent of airbrushing done to the wound at one point, but during restoration that paint was removed.  While you can't tell that his arm has been amputated, the picture is a far cry from the usual Nelson portraits.  The Smithsonian.com article is here:
https://www.smithsonianmag.com/smart-news/new-portrait-lord-nelson-found-scars-and-all-180967205/

EDIT:  Originally, there was not a direct way to show the photo on here, so I provided some links.  Well, as of 12/4 the picture is apparently available online.  So, here it is:


This picture is of a man who is tired, and hurt.  It's certainly an antidote to the usual view we have of him.

Friday, November 17, 2017

Post Captain at Millenniumcon in Austin


On November 10 and 11, I took the ships and Post Captain rules to MillenniumCon in Austin.  While there, I ran two games using the rules, one with only a single ship per side, and a scenario with 10 ships and 8 players in total.  Although I took more photos of the second game, both games were quite interesting albeit for different reasons.

In the first game, I simply pitted a British 74 Large (HMS Northumberland) against a French 74 (Cassard, of the Cassard/Temeraire class).  The two players very quickly understood the rules, and both played their ships as one might expect.  The French player had the wind gauge, and at first stayed outside the 400-yard range so he could move first.  He would duck inside 400 yards to fire during one impulse of the turn, and then move out again in the next impulse.  He kept firing high and getting rigging hits, but the British player was lucky, and kept repairing them.  The British player fired low, and kept chewing away at the Cassard’s guns and hull.  He did get a critical that destroyed the pumps, but the French player wasn’t yet concerned about that damage.   Finally though, the Frenchman managed to get a critical that broke the Northumberland’s fore topyard and that gave Cassard a slight speed advantage.  Now, the Cassard started closing the range to utilize her advantage.  As she approached the Englishman at an angle, it was clear that she was going to use her speed advantage to pull ahead.  Then, once she had the initiative she would turn and deliver a bow rake on Northumberland.   Instead, the British player got a critical hit with his starboard boardside and shot away Cassard’s wheel.  With the Frenchman forced to go straight, Northumberland could turn and deliver a devastating (6 hits, 12 damage rolls) stern rake at about 50 yards with the previously unengaged larboard broadside.  When the smoke cleared, Cassard had the following damage, including what was inflicted in previous turns:
  1. Captain dead,
  2. 4 Crew hits and 3 Marine hits,
  3. 5 Rigging hits,
  4. Mizzen topgallant mast fallen,
  5. Main topgallant mast sprung,
  6. 7 Gun box hits (out of 26 total),
  7. 5 Hull hits,
  8.  Pumps out,
  9. Wheel smashed and
  10. One boat smashed.
At this point, the French player agreed to strike his colors.  By contrast, Northumberland had taken only:
  1. 2 crew hits and 1 Marine hit,
  2. 1 Gun box hit,
  3.  2 boats smashed and
  4.  Fore topsail yard broken
There were also 3 Rigging hits, but they were repaired during the battle.  Both players said that they enjoyed the game.  More importantly, I overheard the losing player describing the game to his friends afterwards and he was both enthusiastic about it and very complimentary.

On Saturday, I ran a scenario entitled “Imperial Issues” that dealt with a ‘what-if’ scenario off the island of Tortola in 1806.  In the scenario, a French squadron of 6 ships attacks a British squadron of 4 ships, attempting to drive them away so that the French can attack the Jamaica Convoy that is set to arrive soon, albeit after the game itself.  While the French squadron has more ships, they are hobbled by the fact that they have been at sea for 6 months and are low on supplies to repair their ships.  So, if any of them lose a mast (defined here as at least a topmast) they must withdraw.  Also, the captain of one of the ships is Jerome Bonaparte and if he is captured or killed the French cannot win.   Unfortunately for the French Admiral, Jerome has a different set of victory conditions and does not have to obey any orders from his superior.  For the British, Antigua is only a couple of days away so they are not worried about ship damage.  However, this squadron is also the convoy escort and there are no other ships available.  Consequently, if any of their ships are heavily damaged or disabled, they must withdraw and thereby lose the scenario.

The picture below shows the beginning of the scenario.  The wind is from the South (left side of the photo), so the French have the wind gauge and the British are pointing.


The North edge of the map are rocky areas off the island, and anyone exiting that edge will run aground.  The other edges are sea room.

The French ships came on in a mad rush, and as soon as the leading ship was within 400 yards, turned to bring her guns to bear.  


The shooting started right after this picture was taken, and for some reason both sides decided to shoot high throughout the game.  There wasn’t much damage being done at the longer ranges though, and so the French fleet closed in again while the British continued in their line ahead.  

The French didn’t have everything their own way though, as the British fired broadsides right into the teeth of their oncoming enemies.


This didn’t stop the French from getting so close that Veteran sideswiped and fouled Northumberland, locking both ships together and breaking Northumberland’s bowsprit.  Because everyone kept firing high, now the rigging damage was starting to pile up.

Since the French attacked without first forming a line, this left all their captains free to pick their targets as they saw fit.  One of the French ships had even hoisted more sail and was working his way to the far side of the British squadron to double it.  Seeing that the British rear was in danger of being overwhelmed, the two leading British ships (Canada and Elephant) decided to tack and come back down to assist their comrades.  Unfortunately, Canada went into irons while Elephant was successful and started to come back towards the battle.


Canada drifted onto the other tack and started back toward the battle, but by then time was almost up.  We decided to play through the blue phase of the turn we were in, and then roll for rigging checks and everything else.  After that, I would determine the winner.  Now this is where things got interesting! 
 
Northumberland was the most heavily damaged British ship, as she had NO rigging boxes left.  That sent the mizzen topgallant mast over the side.  She also had a broken bowsprit, and almost every yard was shattered thanks to a combination of critical hits and the sideswipe with Veteran.  She was, however, still capable of fighting as she had only 2 gun and 2 hull hits along with some other insignificant damage.  Agamemnon lost her upper top and topgallant sails, 2 hull and 6 rigging boxes but still had all her guns.  Elephant lost 3 light and one medium gun boxes and 4 rigging boxes but was otherwise intact.  Canada lost her fore topgallant sail, 4 rigging and 1 medium gun boxes, but were otherwise undamaged.


While the above sounds pretty bad for the British, the French were truly not much better off.  While Eole was completely undamaged and Foudroyant had lost her mizzen topgallant, the other ships were pretty beat up.  Cassard had a sprung mizzen topmast and was missing 8 rigging boxes, Veteran had only 5 rigging boxes damaged, but also had a sprung foremast along with some other damage.  Impetueux also had 5 rigging boxes damaged, along with a heavy gun.  Patriote, however, was in serious trouble.  She had 8 rigging boxes missing and that sprung her mizzen topgallant.  Unfortunately for her, the wheel had been smashed and she was heading towards the edge of the board that would cause her to run aground on the rocks if the wheel was not repaired.  So, while I called the scenario a draw at that point, had it gone on for another turn or two, Patriote would have hit the rocks (unless she repaired her wheel, of course, which I don’t think she would have had time to do).  That would have required the French to withdraw, and thereby give the victory to the British.
 

As an aside, how eager were the French captains to engage their British counterpoints?  Well, this eager:
Patriote fires on both the British flagship Northumberland (right side),
AND her comrade Veteran