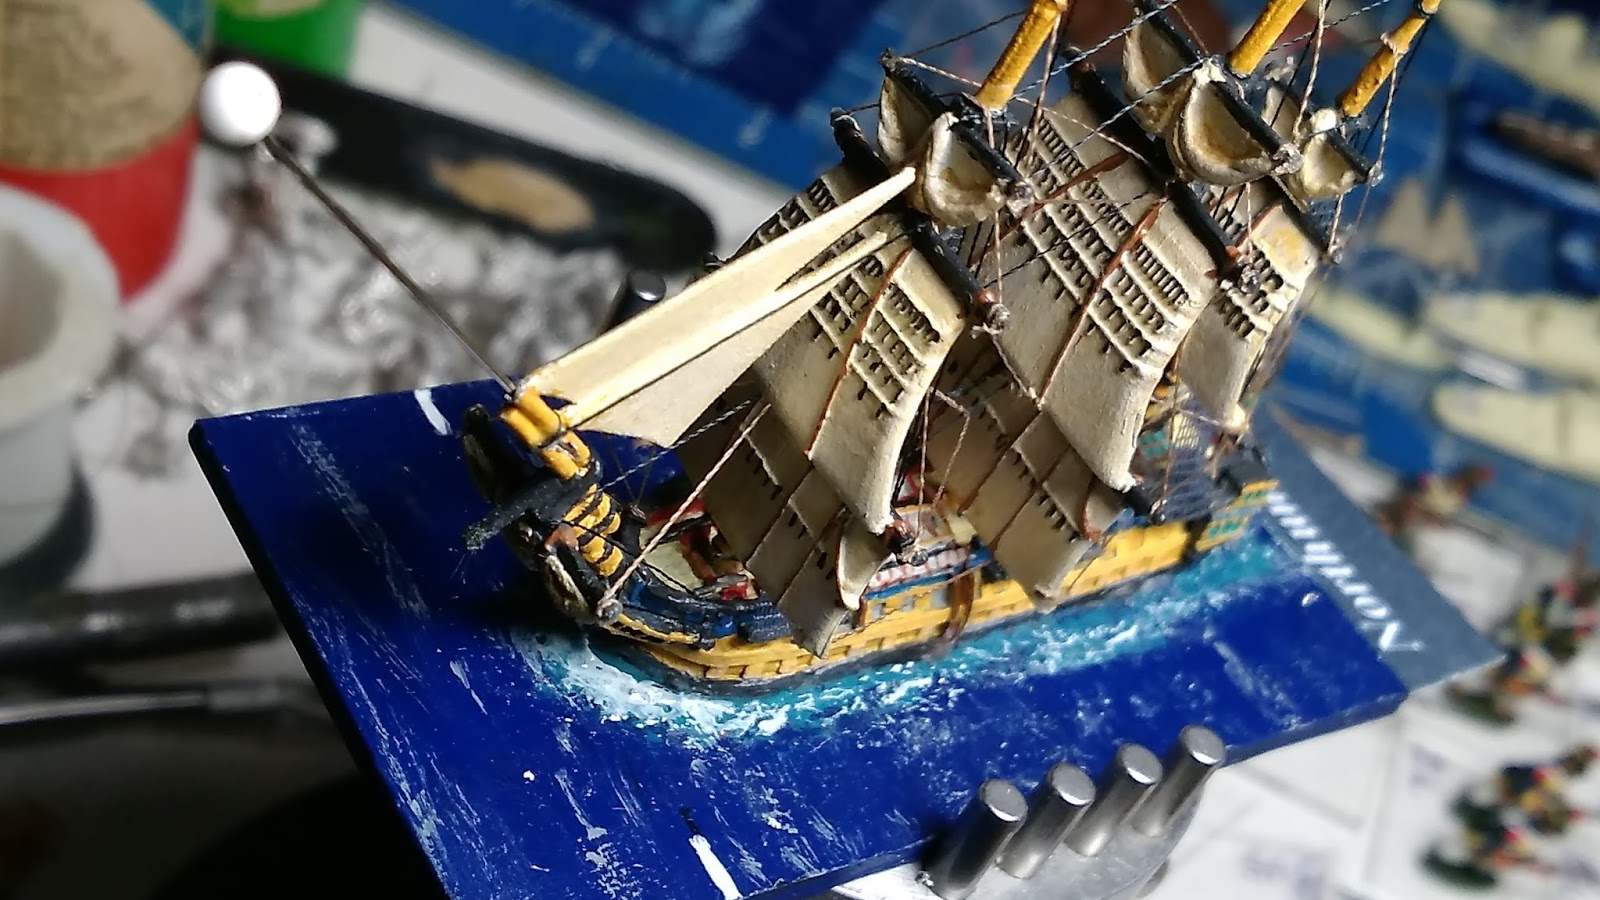
Showing posts with label Rigging. Show all posts

Wednesday, December 27, 2017

What Is My Time Worth, Part 6: Running Rigging

I had planned to have this post in place before Christmas, but there were two things I didn't plan on.  They are:

  1. General holiday season craziness, and
  2. A bout with the flu.
I should have known that the holiday season would mess up my schedule; after all, it's not my first Yuletide season.  I am, however, going to plead ignorance about the flu as I really didn't expect to get sick.  I certainly didn't expect it to turn a week of my time into a blur of sleep, coughing and fatigue.  That's enough about my issues though, as I suspect you're here to read about sailing ships and not sickness.

In this post, I'm going to deal with running rigging.  That's the rigging that, in real life, operates the yardarms and other parts of the sail set.  These lines were not coated with tar, because they had to move through blocks in order to operate properly.  This is whey they are called "running rigging."  On my models, they are done with a light tan thread so as to differentiate them from the standing rigging.  Unlike the standing rigging, when doing running rigging we start at the bow of the ship and work our way towards the stern.    Another difference is that, unlike standing rigging, the number of steps in doing running rigging will vary based on which sails your ship has set.  So, while the Langton rigging guide shows 16 basic steps for running rigging (plus more if the model has its staysails set between the masts), some of those 16 basic steps will be ignored as we go. 

So, from this...


to this in only 16 steps or less.
One other picture that should have been included in the previous post, but wasn't.  The picture below is a homemade tool I use to get glue onto knots in tight spaces.  In practice, I use it almost everywhere, given that the nozzle on a container of glue is way too big to get into small spaces.


It's just a pin vise with a straight pin that has a large head chucked into the larger of the two openings.  It is so useful that I'm tempted to buy a new vise, and convert this one into a permanent tool for gluing knots.

Before starting, I should point out that the running rigging on this model is considerably simpler than the standing rigging.  As the Langton guide points out:

we are only showing the lifts, braces and sheets of the running rigging.
Lifts were the lines from the mast down to the yard arms. Braces were
taken from the yardarms to the next mast in order to be able to trim the
sails to the wind.  Sheets were used to haul on the lower part of the sail.

The first step is to run a line from the foremast stay to each side of the spritsail yard below the bowsprit.  In Harland's book Seamanship in the Age of Sail this line is called a spritsail brace.  I refer to it as "another line to keep the spritsail yard in place if the glue breaks," but then I'm not as precise as Harland.  
So that's the first step....
Step 2 involves the sheets for the jibsails, which are those triangular sails out over the bowsprit.  According to the guide, you should use a separate line for each of the jibsails, but I find this to be too fiddly given the small area you're working in.  What I do is to drill a hole in the rearmost jibsail, tie the line there, run it back to the hole where the shrouds are, take a turn and then glue the end of the thread under the second jibsail.

The highlighted lines run inside the line from step 1, and behind the ratlines.
The next photo covers steps 3,4 and 5, and will have us installing the braces and lifts for all of the foremast.  Here, we start from the lowest line and work our way towards the top of the mast.  Step 3 is highlighted in blue, step 4 in green and step 5 in red.  As you can see, each thread provides both the brace from the main mast to the foremast, and the lift for the yard.

Despite what the picture looks like, the lines do not foul each other.
With this sail set, we skip steps 6 and 7.  That's because there is no royal sail at the top of the mast for step 6, and with the foresail brailed up there is no need for a line to the bottom edge of the foresail.

There are different versions of step 8, depending on whether or not the mainsail is lowered or furled. Either way, step 8 is the most time-consuming step of all for running rigging.  I've tried to color-code the picture below in such a way as to let you see the different sub-assemblies of step 8.  Keep in mind that, even though I've used different colors, this is all one long piece of thread.  You start by tying the thread onto the main yardarm, and then taking it back to hole A (dark blue).  You go through hole A, wrap around the bottom boom of the spanker sail, go up the sail and under the ratlines, go over the crossjack boom and then do the same thing on the other side of the sail (teal blue).  Then, go through hole A on the port side and back up to the top boom of the spanker sail.  Take a turn around the top boom, then take the line up through the gap in the standing rigging and back down to the upper boom of the spanker where you take another turn (light blue).  From there, go back down to and through hole A on the starboard side (light blue).  From hole A, go back up to the top of the spanker boom, take a turn and go down and through hole A on the port side (pastel purple).  From hole A on the port side, to up to the port mainyard and wrap the thread around it (dark blue again, on the port side).  From there, take the line over the topgallant yardarm, back down to the yardarm on the starboard side, tie off and glue it (dark green).  Trim off any excess once you're done.

Sorry, but I don't think I can make it any simpler than this.

Step 9 is ignored because the main sail is furled, so the next picture shows us steps 10, 11 and 13.  We ignore step 12 for the same reason as step 6: i.e., there is no royal sail on the mainmast.  For the sake of consistency, I've colored the steps in this photo the same way I did the photo for 3 through 5.  This set of steps is a little different, because here we start in the middle, move to the top,and then drop back to the bottom for step 13.  When you look at the model in person, though, this makes sense, because you do the interior lines first and then go back to the crojack line which is outside of the other two.

Light blue first, then green, then red.
The green line in the above photo should be back against the mast like all the other braces, so that's a mistake on my part.  I suspect I didn't let the glue on the knot dry enough before I started running the lines.

Now, we're in the homestretch as there are only 3 steps left.  We can ignore step 16 though, as there are no royal sails on the mizzenmast.  In these last two steps however, are the major differences between British warships and every other nation's vessels.  British warships (and warships only) ran the running rigging for their mizzen sails back to the top of the spanker boom.  Every other nationality ran these lines forward to the main mast.

British mizzen rigging.

 
Everyone else's mizzen rigging, including British merchants.
With the mizzen rigging finished, the ship is now complete.  Total time for the running rigging was 106 minutes, or 1.76 hours.

There are still some little things, like finishing the ship's base. However, as  I make my own bases and buy the material in bulk, there is no way to directly compare them to buying and painting a resin one.  Because of that, I won't be including the time or cost of the base in the project.  I had also wanted to make this the final post, but given how long it already is I think I'll save the final analysis for one more post.

Wednesday, November 29, 2017

What Is My Time Worth, Part 5: Standing Rigging

So with the masts in place, it's time to start doing the rigging.  This is the area where most gamers start saying things like, "Oh, I can't do that."  Truth be told, looking at a finished model without seeing how it was done can be a little intimidating.  There are, however, several guides available to the modeler that will walk them through the process.  Some of them are online, and a good one is at my buddy Vol's blog: http://volsminiatures.blogspot.com/ .  Look for "Rory's rigging guide", as it is in several entries, and some can be purchased.  Personally, I use Rod Langton's guide, which is pictured below:


They now cost $22 from Waterloo Miniatures here in the US,
but to me it's been worth every penny.

I will try to follow the rigging instructions step by step, as they are outlined in the manual.  That is probably the quickest way to see how we go from this:

Nice enough, but naked.

to this:
Now, she is starting to look like a sailing ship.


The first step is drilling the holes that will let us run the rigging.  Normally I would do this before the hull was painted, but decided to wait on this ship so that all the steps would be in a logical order.  If  you do this, you will have to touch up paint on the hull and possibly the deck when the drill bit goes through and scratches your work.  The picture below is from the rigging guide, and shows where the holes need to be:


Holes A, B and C are each .5 millimeters with hole D being .7 millimeters, but I drill A with a .7 millimeter drill bit as well.  That's because there will also be running rigging going through that hole.  You'll also see a handwritten note about an extra hole near the bow.  That's so the bowsprit can be rigged.  It's mentioned in the book, but not shown on the reference sheet.  There is also a .7 millimeter hole at E, which I should have mentioned in Part 4 but apparently didn't.  To give you an idea of how small these drill bits are, here's a picture of them:

.5mm on left, .7mm center.  The big one on the right is 1/16 of an inch.
I get my small bits from Micromark. https://www.micromark.com/


  1. Here, we drill the holes at A, B, C and the one I have written in.
  2. Next comes the .7mm hole at D.  The manual also says to drill the hole at E here, but I do that before the masts are installed.To drill the nine holes in the hull took me about 23 minutes, including touching up the paint where needed.  Next comes the stays, or the lines that run between the masts.
  3. This runs from the bowsprit, around the left side of the foremast, over the main yardarm and through the hole drilled there earlier.  In the photos below, it's highlighted in orange and took 23 minutes to complete.  
  4. This line runs from the foremast, over the main yardarm and through the hole where it's tied to the larger string.  It's highlighted in bright green. 
  5. The gammoning of the bowsprit comes next, and it's done in purple.  This helps hold the bowsprit in place on the real ship, and does the same thing here by keeping it from bending up.  It's hard to see in the photo, but it's done in a figure 8 shape that also runs lines out to the spritsail yard.
  6. After all that, the next line is pretty simple.  It runs from the mainmast over the crojack yard and secures the mizzenmast.  You'll see it in bright yellow.  Steps 4-6 took 44 minutes total.
  7. Finally (for these threads) is what the manual calls "a long length of thread and it finishes off the lower stays.   It runs all over the ship, and you'll see it highlighted in pale blue.  It took 27 minutes to install.  The total for standing rigging to this point: 106 minutes, or 1.76 hours.
Highlighted lines are explained above.
Next up are the ratlines, and this is where I do things a bit differently from the Langton manual.  When it was written, When my copy was written, there were no photo-etched brass ratlines, with a mesh being used instead.  The manual recommends those mesh ones be put in after all the standing rigging is in place.  I find that's too hard to do with the brass ones, so I install them before I install the backstays.  They come in unpainted brass (as seen below), and I simply spray paint them black and then seal them with a spray of dullcoat.  After that's done, I cut them from the sprue, touch them up with a black Sharpie, and install them.  It's never an exact fit; you have to cut some off of the top to ensure that the bottom sits on the channels like they're supposed to.  It took 28 minutes to install the six lower ratlines, and 17 minutes to install the six upper ones.  It takes less than 5 minutes to paint and seal them, so I called it 3 to make this step an even 48 minutes.

I'm pretty sure this picture is larger than life-size.
After this is done, it's now time to do the backstays and remaining stays.  The manual says to start from the mizzenmast and work your way forward.  This makes senses, because it gives you more free space to work in.  You take another "long length of thread," and run it up and down the mast three times to give you the backstays.  After you tie that off to the mast, you use the remainder to make the other stays running towards the bowsprit.  I've tried to use different colors to show how the lines go up and down, but may not have been too successful.  Anyway, the times for each mast are:

      8.   Mizzenmast: 35 minutes
      9.   Mainmast:    28 minutes
      10. Foremast:     25 minutes

Lines from earlier steps have been erased (although not very well).

And that gives us a total of 88 minutes for the backstays.  Now, we're almost done with the standing rigging, with all that's left to do being rig the bowsprit.  Rather than take another picture of the ship and having to erase more lines, I'm going to be lazy and use a view from the manual.  


   11.  This is one line, tied in the center at X, then run in numerical order (number 2 are the holes we drilled back in step one) and tied off under the bowsprit at 3.  Time for finishing this line was 19 minutes. 

Total time for doing all of the standing rigging was 261 minutes, which works out to 4.35 hours.  When combined with the other times I've recorded so far, this gives us a total of 11 hours and 28 minutes, which we can round to 11 1/2 hours.  In the next "What Is My Time Worth" post, I will do the running rigging and bring this project to an end.


Tuesday, November 28, 2017

Refitting and Repairs

One of the things AOS gamers have to realize is that, if we take our ships out and let people play with them, they are going to get damaged.  I should emphasize at the beginning that this is not something they are doing on purpose.  (OK, that one guy joked about it one time, but it was probably a joke even if I didn't take it that way. Besides, that is a story for another time.)  Instead, it's just the nature of the beast: our 1/1200 scale models are more fragile than regular miniature soldiers.

It used to bother me more than it does now.  What changed my attitude, you might ask? The simple answer is: research.  We like to think of sailing ships as machines that could go around the world, only stopping to resupply the crew and that is partially true.  What else is true is that the real-life ships required maintenance on a pretty regular basis beyond what the crew could provide.  Without getting into too much detail, repairs could range from a "refit," which meant only working on the rigging, to a "great repair" which could go so far as taking a ship apart and lengthening it as was done with the 98-gun Prince.  Even without these, a ship could expect to visit a dockyard about once every two years just to replace copper plates along the bottom.  So, with that in mind we probably shouldn't complain about a little repair work now and again.

The two candidates for a refit after Millenniumcon were Cassard and Northumberland; not coincidentally I suspect, those two also saw the most use over the weekend.  The repair on Cassard was the simplest, with a single line on the bowsprit broken.  I didn't take any pictures of the repair because, to be honest, there wasn't any need.  Cut away the broken line, glue another one in its place and that's that.  If you've built any model sailing ships, you could do this repair.

Northumberland had a bit bigger problem, although in the same neighborhood.  Somehow, the last 3-4 millimeters of the bowsprit managed to get broken off, even though it was still glued to the rigging.

How did this happen, you ask? I have no idea, so I'm blaming the
little lead Captain for following too close.
At first I thought I could take the easy way and just glue everything back together.    Of course, I should have known better and that didn't work.  So, out came the little drill bits, and I bored the usual hole in the end of the bowsprit.  After that, I fitted a straight pin into the hole to make sure it would fit.

Have you thought about leaving it like this, you ask?
Yes, yes I have.
Then, I measured the pin and cut it to roughly the right length with some snips.  After gluing it in place, I cut it a bit closer to the correct length and cut away some of the rigging that would need to be replaced.  That happened because I couldn't hold the old rigging in place and fit the pin, and the rigging wouldn't stretch enough to go over the new piece.  Also, the old rigging would not be as taut as I like.

Not looking too great here, but...

Slap a little paint on it, and it's not too bad.
After that, it's just a case of re-running the lines I had to cut away, and she's finished.

Ready to rejoin the fleet!
If there's a moral to this post, I guess that it's don't be afraid to let your toys out into the wild.  If you had the patience to build them, you can definitely repair them.  To revamp/slaughter an old adage:

"Your miniature ships in storage are safe,
 but that's not what your miniature ships are for."

Sunday, August 6, 2017

What Is My Time Worth, Part 1

There's no doubt that 1/1200 scale sailing ships can be very labor-intensive compared to other miniatures.  Even if you don't rig them, you still have to paint the hull with all its tiny details.  Then you have to assemble the sails and masts, paint them, and glue them into the hull.  Once that's done, then you have to make a base for them, or buy a pre-made one which will still have to be painted. If you do decide to rig them, then that's even more work.

So then, it's not a surprise that there are few places or people that will paint and/or assemble them for you.  When you can find one, their services don't seem very cheap.  For example, a rigged British 36 gun frigate from ModelJship.com with white metal sails and a base costs 73 Euros, not counting shipping. At this writing (early August 2017), that is approximately $85.96 US.  A three-deck ship of the line like HMS Victory costs 138 Euros/$162.47 US.  By comparison, that same $85.96 will get you anywhere from 42 to 85 to 122 painted 15mm infantry figures from Fernando Enterprises in Sri Lanka (http://www.miniaturelovers.com/15mm.html).  The wide variance in the number of 15mm figures is because Fernando Enterprises offers three different painting levels to choose from.

I now realize that I have no idea how long it takes me to build and rig one of my models.  What this series of posts are going to do then, is to try and figure out how long it takes to build one ship, and how that compares to the prices above.  I'll build a British 36 gun frigate, and record my progress in this post.  When it's done, we can see what my time is worth by comparing it to the ModelJShip price.  I suspect (and am a little afraid) that I won't like what I find out very much!

First up is the miniature itself.  A British 36 gun frigate hull from Waterloominis.com costs $6.50, the sails costs $7.25 and the ratlines costs $3.00.  I've used the same spools of threads for years, so won't count that.  I can make many bases from the plastic sheet I buy, so to price that we'll use the cost of a resin base which is $3.50.  That makes the total cost for the raw material $19.25.  In the next post, we'll take a look at how long it takes to paint the hull.