Showing posts with label Painting. Show all posts

Wednesday, July 29, 2020

"It's a do or die situation - we will be INVINCIBLE!"

It's time to start writing about ships and song lyrics again!  I know that COVID-19 is still running rampant, especially in my part of the world.  So yes, this could clearly be called "Love in the Time of Coronavirus Part 3" or whatever.  But ya see, I want things to go back to normal.  I want to visit my friends that I haven't seen in months, and I don't care whether it's to play games or just chat.  I've come to appreciate virtual gaming applications like Roll20 and Discord; they have allowed me to get SOME gaming in.  It's still not the same as pushing real minis around a tabletop though.

Now, I can already hear what you're saying to your computer: "Yeah, well, that's the same thing we ALL want! Stop whining, you big baby."  πŸ€”πŸ€”πŸ€”  OK, fair enough.  My point though, (such as it is) was simply that here things can be normal, more or less.  That means less mentioning the Coronavirus, and more talking about ships and finding a song lyric that fits the subject of my posts.

In this case though, finding an appropriate song lyric was almost ridiculously easy.  As mentioned in the "Love in the Time of Coronavirus" posts, my newest air/naval project is the Falklands War.  After painting British warships for the Cod Wars, it was a natural progression.  I mean, why not get more than one use out of your minis when you can, right?  Also, I have to admit that I love the Royal Navy ship designs from the 1960's to the 1980's.  They just look good.  Finally, the Falklands War has one of the best "what-if" scenarios of all time, and it requires almost no jiggering of real life events.  Let me explain. . .

On May 2, 1982 most of the Argentine Navy was at sea, including their aircraft carrier, the 25 de Mayo.  Their objective was to find and strike either of the Royal Navy's two aircraft carriers: HMS Hermes and HMS Invincible.  With the British at the end of a 6,000 mile supply line, the Argentinians thought that any serious damage to either carrier would force it to leave for repairs.  If the Royal Navy lost one of its carriers, that might well tip the balance of the war to Argentina.  The Invincible group  was found late on May 1, and at 0600 the next morning, the Skyhawks were ready to be launched.  Then, fate (or nature) intervened.

The Skyhawks needed 40 knots of wind over the deck to launch with a significant ordnance load.  The carrier could make 20 knots, but the South Atlantic winds refused to cooperate and stayed at 10 knots (some sources say a dead calm), making impossible to launch the strike.  So, the first carrier versus carrier combat since WWII did not happen.  Like I said, it's the perfect "what-if" scenario, and all you really need to do is make the wind a few knots faster.  The normal winds for that time of year in the South Atlantic are 15-25 knots, so it's not even an unrealistic adjustment.

For a scenario like this, you have to have a target.  I found mine thanks to www.waterline-ships.com.  Martin, the proprietor, had an assembled and painted Triton/Skytrex Invincible and I quickly snapped it up.  As usual, I decided I didn't like the old paint job and decided to repaint it.  Unfortunately, I don't have any photos of the old version.  The original idea was to just repaint the flight deck, but as always, I wound up redoing the whole thing.

The problem is, I wound up repainting the flight deck more than once.  For those who don't remember, the flight deck of the Invincible looked like this:

Illustrious (front) relieves Invincible, August 1982.

Well, I thought I could paint those stripes by hand and keep them straight.  THAT necessitated a second repaint of the flight deck. So, after a lot of paint, a bit of cursing, and some payments to decal makers, my Invincible now looks like this:


The white stripes are from a company called Microscale who mostly make decals for model railroads.  The numbers are from Miscellaneous Miniatures (https://miscmini.com/).  As with any of my projects, the mistakes appear pretty obvious to me.  Some of the lines that run the length of the deck are a little bit wavy.  They don't look that bad in person, but it's pretty blatant looking here.  I think the problem is that I put those down in 1" segments, so there was more chance for them to not be straight.  Also, the lines on the sides of the main runway are too wide.  Every stinking picture I had of Invincible, I sear those stripes looked wider than the rest.  Not until I was finished and the deck was sealed did I find a close-up of the ramp that showed all the lines the same width.  Finally, the engraving on the deck was very light, and in the multiple times repainting, I lost the deck elevators under the paint!  I'm thinking about cutting some .001 plastic sheet to size and putting them in place, but just haven't done it yet.

As a closing thought, I know that big open deck looks awfully bare.  The next step will be to find some 1/1250 deck gear and aircraft to spot here and there.  Even like this, though, she'll make a good looking target for the Argentine Skyhawks I'm painting up.  Those will be in a future post, of course.

OH, one last thing now that I think about it. (Don't πŸ™„at me; I can practically hear it through the monitor.)  I thought that with the Coronavirus, I'd be making a lot more blog posts.  Obviously, that hasn't quite worked as planned.  The reason for that is our family has rediscovered game nights.  After dinner we play cards, or dominoes or Yahtzee.  For some reason, that's a lot more fun easier than writing blog posts!  I promise to do better in the future.

Wednesday, December 5, 2018

So, about those clear ships....

This is going to be just a quick post before the craziness of the holiday season takes over and pretty much shuts everything down.  In my Cod Wars post, I put up some pictures of the Shapeways 3D printed ships that are going to make up the project.  Several people in the comments section on that post were curious as to what the models would look like when they were painted.  So, for one of the last posts of the year, here are some pictures of what I've done so far.

While the ships are finished, the bases are not.  There will be some waves, and wakes around the ships.  The ships are finished though, and that's what I'm showing off here.  I've tried to paint these based on ships that were involved in the Cod Wars, and not just generic examples.  For the side trawlers, that's been pretty easy and there are lots of photos of them.  For stern trawlers, it's been a little more difficult.  I haven't painted any stern trawlers yet, so for right now it's not really an issue.

First up is the trawler Westella.  Her registration number was H194, which I'm pretty sure means she was based in Hull.  Here's a picture of the original:


And here is my version of her:


The hardest thing has been matching the color of the cabin, and I still didn't get it completely right.  In real life, the cabins are steel but are painted to look like woodgrain.  I can't do that in this scale, so went with the darker yellow (which is clearly still not dark enough).  I also might still put some black dashes along the deck area to simulate the drain holes to let water flow away.  All these trawlers come with the mast, but you have to add the supports that run forward.  Those are made of brush bristles.

Next is the Arctic Corsair.  She is another Hull trawler (H320), and is preserved as a museum ship in Hull.  She definitely participated in the last Cod War, as she rammed the Icelandic Coast Guard vessel (ICGV) Odin after that ship tried three times to cut the Arctic Corsair's lines to her nets.  As with Westella above, here is the real thing:


And here is my version of her:


I know the rust looks a little overdone.  However, in looking at photos taken of the trawlers at sea, some ships look like the rust is what's holding them together!  I concentrated the rust amidships, since that is where the vessels took the worst beatings, due to hauling in nets.  Also, yes the red band on this funnel should have a white band inside it, but my hands aren't steady enough for that anymore.

One problem that I did run into painting these was that there weren't a lot of color photos at deck level taken of these ships.  Fortunately though, there are a lot of photos on the Trip Adviser.com site for Arctic Corsair, and that's what I used to choose things like deck colors and the like.

So there you have it.  In my opinion, they don't paint up too badly at all.  One piece of advice though; be sure you use a primer on the models after you wash them, and not just any dark colored paint for your basecoat.  Trust me when I tell you that it will make a HUGE difference; in fact, it may well be the difference between painting your models and making the same order again.  That, however, is a story for another post. πŸ˜€

EDIT AND QUICK UPDATE:  I want to take a moment and give a big "thank you" to user Grelber over on TMP, who got me to think differently about putting stripes on the funnel.  Instead of painting a red streak and trying to put a white stripe inside it, he suggested painting everything white and using some Sakura Micron pens to put on the red stripes.  It worked extremely well.  My Arctic Corsair model went from this:


To this:


Yes, still a little shaky, but that comes from cleaning up the white area.  I think she now looks a LOT better.

Monday, October 2, 2017

What is My Time Worth, Part 4: Painting and Installing the Masts

This post comes to you with a mixture of emotions.  I'm happy that the masts are finally painted and in place because that means rigging is next and the end is within sight.  I'm unhappy, because it seems that I've gotten quite good at repairing the things I occasionally break while building these ships.  More on that later.

I went round and round with what color to paint my masts.  The recent repaint of HMS Victory seems to indicate that the masts are not necessarily the same color as the sides of the ship.  Instead, they are more of a cream color.  Of course, that brings up the question of, "what color is cream?"  Technically, it's the pastel color of yellow, according to Wikipedia.  Googling "cream color" will give you a whole range of shades, many of which can't possibly be right.  In the end, I went with a suggestion from Mark Barker of the Inshore Squadron, and used a desert sand color over a black basecoat.  My desert sand doesn't have the slight pink tone his did, but it does make a pale tan that contrasts nicely with the hull.

So, how long did it take to get all this done?  Well, as I mentioned in the first paragraph, there was some breakage.  Like the old doctor joke says, "First, the bad news."  After having everything painted and waiting for the sealant coat, I knocked two of the masts off my painting desk as I was getting up.  The top of the mainmast curled back onto itself into a circle, and the foremast snapped just below the furled course.   I don't have any pictures of this, because I was too busy saying filthy words at a higher volume than I usually speak  I'm pretty sure some doors were slammed too.  After a day or so to decompress, I was able to straighten out and repaint the mainmast.  I repaired the foremast the same way I repaired one of my Spanish 74s after I knocked it off the table. You drill a .5mm hole in both halves of the mast, then make that larger with a .7mm drill.  Then, you pin both halves using a straight pin cut to length and glue it all together. I don't have any pictures of this process, as I was busy trying to make sure I didn't drill a hole in my fingers, or out the side of the mast.

I didn't keep track of how long the repairs took, because I want this project to document how long a model takes to build under regular conditions.  With that in mind, how long did it take to gets the masts painted and installed?  I took more detailed notes this time, and can break things down accordingly:

  1. cleaning and assembling masts and bowsprit, 22 minutes
  2. priming, 3 minutes
  3. to paint the masts, 29 minutes
  4. to paint the sails,  17 minutes
  5. to paint the yardarms, 29 minutes
  6. for touch-up and  mast bands, 29 minutes
  7. for buntlines and reef points, 25 minutes
  8. for final touch-up, 14 minutes, and
  9. for sealing and installing the masts, 12 minutes.
That's a total of 180 minutes, so 3 hours right on the nose.   Combine that with the 247 minutes it took to finish the hull and we're up to 427 minutes, or 7.12 hours.  However, we're now ready to start drilling holes and putting the rigging in place.  The end isn't near, but as I said earlier, it's certainly in sight.  Even better, she's now starting to look like a ship.

The base will be detailed later.

The masts are in line with one another.  In my rush to snap a picture, I didn't
line up directly on the bow.


Sunday, September 10, 2017

What Is My Time Worth, Part 3: Painting the Hull

As the title says, this is the point where lots of paint starts getting sprayed, brushed, rebrushed and otherwise applied.  So, how do we get from this:

Full disclosure: This is not the one I am painting.  I forgot to take a
picture of it unpainted.


to this:
Perhaps I should have taken this off the painting stick so you could see the
hull a bit better?


I use a black spray paint undercoat for my hull and my masts.  While it does mute the colors that go over it somewhat, it has the advantage of hiding any small areas that my paint job misses.  A white or grey undercoat, on the other hand, makes those areas stand out even more.  What you can't do though, is just use the undercoat as your base coat and paint around it.  Even though the model is on a painting stick, the undercoat will still rub off from handling.  So yes, the black undercoat then gets a coat of black on top of it.  πŸ˜’  Of course, it doesn't have to be black.  I've also used Payne's Gray on hulls, and it gives a different, shinier look than straight black.

I had originally thought about doing the ship based on the painting of HMS Euryalus in The  Trafalgar Companion, which shows her looking like this:


I later chose against it, mainly because I was tired of painting a scheme I've come to refer to as BBB (Basic Boring British).  Instead, I pulled out my Anatomy of the Ship: The Frigate Diana and decided to go that way instead.  If you're not familiar with that book, HMS Diana looks like this:


A bit more colorful than HMS Euryalus is portrayed, to say the least! So, why did I choose this paint scheme instead of the previous one?  My rationales go like this:
  1. When I get to play the Battle of Trafalgar, the smaller ships likely won't be on the table,
  2. It is still an authentic historical paint scheme,
  3. The earlier paint scheme of Diana will give me more use out of the ship, and 
  4. I was tired of painting black and yellow (Did I mention that earlier?  I feel like I might have.).
 When I paint a hull I do the deck first, then the sides, and then finish up with the bow and stern.  I don't use washes because I have never managed to get a good hand on using them.  They either come out too dark, or with no effect at all other than muddying up all the colors.  So, what you see on the upper deck is the end result of painting and then careful touch-up work.  It is probably slower than using washes, but it's also the only way I know how to paint.  The bow and stern are painted the same way:  Paint, touch-up and re-touch until it looks right.

If you look at the hull, you'll see that the gunports without covers are painted in either a dark gray (in the hull) or a lighter gray (on the upper deck).  I do this so that it gives the effect of light coming through the gunports on the upper deck, or the shadows of the gundeck.  The hull gunports on this ship are particularly dark, because I figured that the boats on the skid beams will block out most of the light coming into the lower deck.  The light gray areas around the upper deck are hammock storage, and the dark brown lines on them represent the stanchions that support the netting.  The Langton manual on painting suggests painting light brown or gray criss crossed lines to represent the netting, but I can't do that neatly.

I don't have a specific time breakdown for each part of painting the hull, because it's not really that simple.  I know I said deck, hull and then bow/stern but it's not quite that simple.  When I'm painting the hull, if I see something I missed on the deck then I go back and fix it.  The only thing that I can say with any certainty is that it took 50 minutes to paint the stern and quarter galleries to my satisfaction.  Overall though, my notes show that it took 185 minutes to completely paint the hull.  Given that my timing isn't totally exact, I'm OK with saying that it took 3 hours to go from bare metal to finished hull.  In the next installment, I'll paint the masts and get them ready to glue into the ship.

Monday, September 4, 2017

Real Estate!

No, this post is not going to tell you how to "flip" houses for a profit or make millions in real estate with no money down.  I'm pretty sure there are more than enough web sites and reality shows on the topic, if that's where your interests are.  Good luck to you and thanks for stopping by.

What this post is going to do instead is to talk about the kind of real estate navies have to deal with on occasion, and the models that represent them on the tabletop.  First up are forts.

While there is a huge difference (even in game terms) between an earth battery with a few guns and a brick fortress with dozens or more, a warship is best advised to avoid them all if they are unfriendly.  After all, even the great Lord Nelson allegedly said, "A ship's a fool to fight a fort."  Of course, he also said, "Desperate affairs require desperate measures."  With that in mind, let's take a look (or looks, as this will be more than one post) at some of the different terrain that naval gamers can expect to deal with.
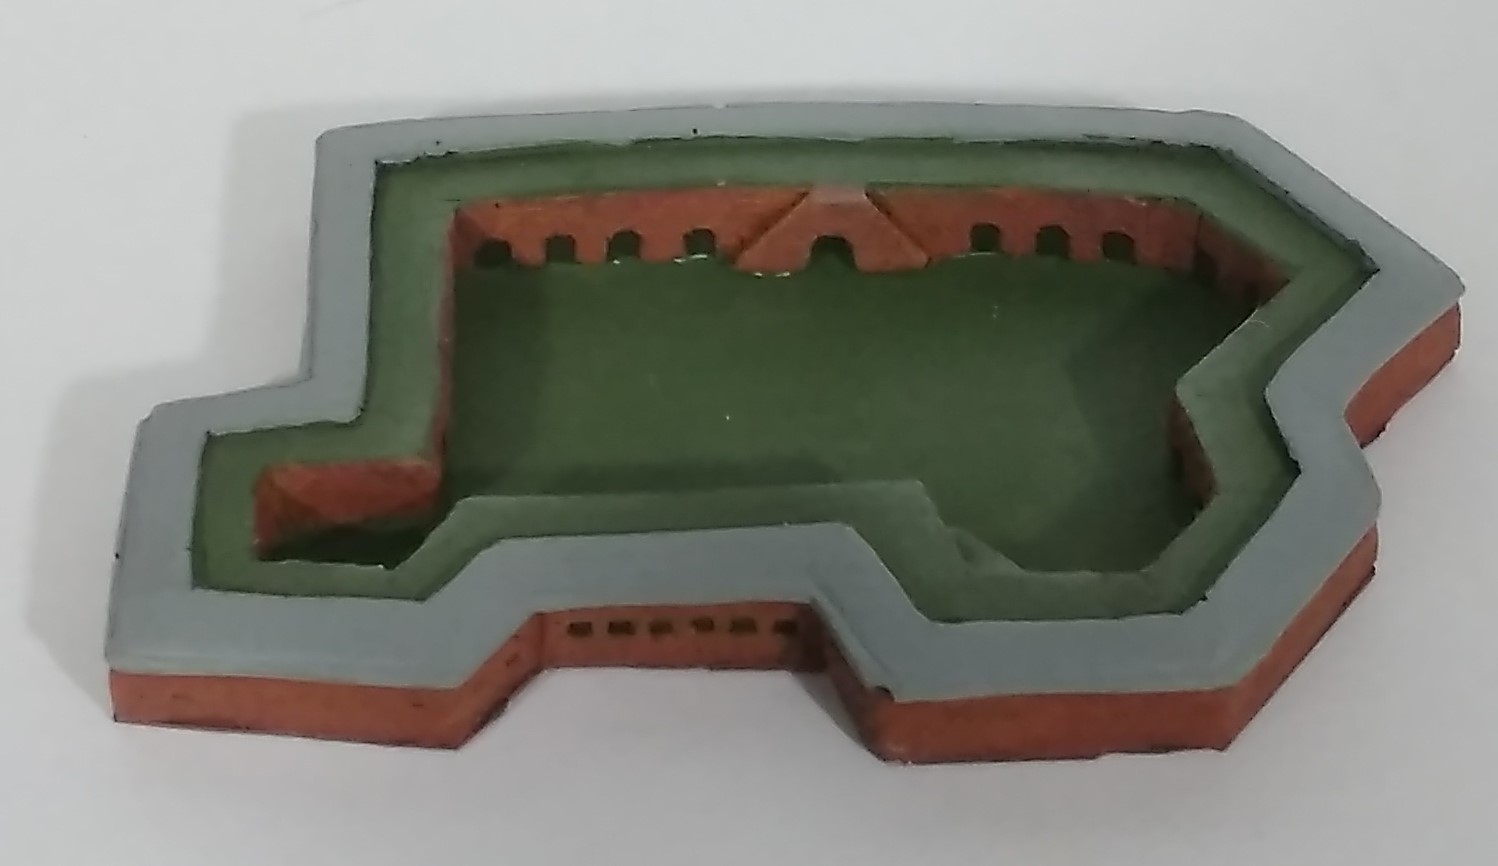
These are the big fortresses, those brick and mortar fortifications that represent the worst that a ship or fleet could possibly have to deal with.  I've got three of these, and will probably never need any more than that.  If anything, I should probably buy some more bomb vessels just to deal with these.  My first fort was bought at a convention flea market years ago.  It has no marking on it anywhere, and I think that it was not professionally made.  It is a generic fortress with 4 bastions, and I suspect that it might be based on Castillo de San Marcos in Saint Augustine Florida.  If that is the case, then my model needs a repaint as you can see below:

The original.  The walls may have started out as a tan color, but time has changed that.
In my defense, I did this a long time ago.
Next up are a pair of forts from Pithead/Spithead Miniatures 1/1200 American Civil War line.  They are forts Jackson and St. Philip that guarded the Mississippi River below New Orleans.  Saint Philip is the oldest of the two, having been built by the Spanish from 1792-1795.  It was then modified by the US from 1812-1815, and was besieged by the British during the War of 1812.  In the 1840s, the walls were thickened and strengthened.  An excellent summary regarding the changes in Fort St. Philip is located here: https://www.nps.gov/nhl/find/statelists/la/FortStPhilip.pdf .  The two models are made from a heavy black resin (polyester maybe), that at first appears to hide most of the detail.  However, an undercoat brings out the detail very nicely.  As a final note, the masters for these are hand-carved, not computer modeled.  If you prefer the perfection of a computer designed miniature, then these might not be for you.  However, I like the old-school vibe of these, and am planning on buying some Civil War ships from there as well.  This clip from a map depicting the 1812 battle shows the original form of the fort.


There are numerous maps of the fort in the Civil War, and all of them are different.  So this clip is taken from the 1921 plan drawn by the army.

Everything outside the fort should be ignored, as they are post Civil War additions.
Anyway, with the above drawings showing how the structure changed over time, I think you will see that the Pithead model does a good job of capturing the building itself.


While it doesn't represent the original 1815 fort (and shouldn't since it is a Civil War model), I think it will work fine for those times when you need something small, but strong and oddly shaped.

Next up on the list is Fort Jackson, which can also be used for Fort Morgan.  While this is not a Napoleonic fortress, being built from 1822-1832 it is the classic 5 sided star fort.


In a project like this, it's amazing what will trip you up at times.  When I painted the citadel/barracks, I presumed that the roof would be fireproof, so I painted it a slate color.  After some more digging, I found that the barrack roofs at both Jackson and Morgan were wooden.  The idea was that they would be covered with earth before an attack to make them bombproof.

The Saint Philip casting is one piece, where Jackson is 6 pieces; 5 wall parts and the citadel.  Consequently, Fort Jackson does take a little patience and greenstuff putty to make the walls fit together smoothly.  In all fairness to Pithead Miniatures though, this is clearly visible on the website picture of the unpainted version so it's not really a surprise.  To really nitpick, the citadel should be 10-sided and not round, as seen in the 1817 plan below.


I'm sure that the round version is easier to cast, and even in the plan it looks almost round.  Given that this one and the one at Fort Morgan burned during the battle, I don't think that a round casting is a deal breaker here.  I probably could make it look a little more multi-sided by filing the edges of the roof straight on each face, but didn't want to run the risk of messing up the citadel.

When will these get used?  Who knows.  However, when I do need them, I'm ready.  In the next real estate post, I'll take a look at things like lighthouses, signal stations and other less warlike structures.  You know, things that ambitious naval officers call "targets."

Sunday, August 6, 2017

What Is My Time Worth, Part 1

There's no doubt that 1/1200 scale sailing ships can be very labor-intensive compared to other miniatures.  Even if you don't rig them, you still have to paint the hull with all its tiny details.  Then you have to assemble the sails and masts, paint them, and glue them into the hull.  Once that's done, then you have to make a base for them, or buy a pre-made one which will still have to be painted. If you do decide to rig them, then that's even more work.

So then, it's not a surprise that there are few places or people that will paint and/or assemble them for you.  When you can find one, their services don't seem very cheap.  For example, a rigged British 36 gun frigate from ModelJship.com with white metal sails and a base costs 73 Euros, not counting shipping. At this writing (early August 2017), that is approximately $85.96 US.  A three-deck ship of the line like HMS Victory costs 138 Euros/$162.47 US.  By comparison, that same $85.96 will get you anywhere from 42 to 85 to 122 painted 15mm infantry figures from Fernando Enterprises in Sri Lanka (http://www.miniaturelovers.com/15mm.html).  The wide variance in the number of 15mm figures is because Fernando Enterprises offers three different painting levels to choose from.

I now realize that I have no idea how long it takes me to build and rig one of my models.  What this series of posts are going to do then, is to try and figure out how long it takes to build one ship, and how that compares to the prices above.  I'll build a British 36 gun frigate, and record my progress in this post.  When it's done, we can see what my time is worth by comparing it to the ModelJShip price.  I suspect (and am a little afraid) that I won't like what I find out very much!

First up is the miniature itself.  A British 36 gun frigate hull from Waterloominis.com costs $6.50, the sails costs $7.25 and the ratlines costs $3.00.  I've used the same spools of threads for years, so won't count that.  I can make many bases from the plastic sheet I buy, so to price that we'll use the cost of a resin base which is $3.50.  That makes the total cost for the raw material $19.25.  In the next post, we'll take a look at how long it takes to paint the hull.