Just as a quick FYI, this post is going to be a little bit different from the others. Instead of finishing the entire boat and then publishing the post, I'm going to publish it now and add to it as the construction goes on.
Armaments in Miniature (or, AiM) is probably best known for their 15mm aircraft from various eras. However, while going through their website one day I found this model, and decided that I had to have one. The boat appears to be made from the same white resin that their other models are made from. There is the slightest hint of a mold line on the starboard side and rear of the hull, but it is easily shaved away with the back of a knife blade. For any other company I would be raving about the cleanliness of the hull casting. As a long time AiM customer though, I find myself simply nodding and going, "Yeah, about right for them." That's probably unfair to AiM, but they set very high standards for themselves.
For step 1 of the assembly, I did nothing more than take the hull out of the bag, take a few knife swipes to remove the mold line, and then drill a hole in the tub so that I could magnetize it. The magnets aren't really necessary, but I think they will make the boat travel a little more safely along with adding some 'gamer protection.'
 |
| Yes, the hull is that clean, right out of the package. |
 |
| The casting may look rough, but remember the picture is much larger than life size. |
 |
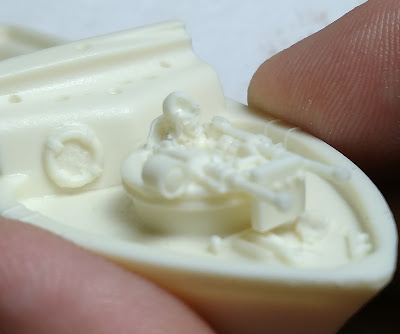
| So, there's the air bubble. I appreciate the fact he appears to be wearing goggles or sunglasses. |
 |
| Yep, he's gonna have a headache all right. |
 |
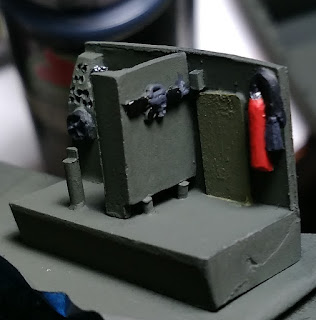
| The right side bulkhead is a separate piece that I've already glued in. |
 |
| Obviously, a little cramped once it's all together. But it's very nice! |
We're gonna put this guy:
I'm so impressed with the coxswain figure, that I want to show a couple of pictures of him before he's painted.
I had trouble getting my camera to focus on him, but you can still see that he's wearing a beret with badge, and sunglasses. What you can't see is that he has an open top holster on his right hand side, and that the ribbons from the beret are hanging down the back of his head. He clearly has on jungle fatigue pants, but you can't really tell what's under his flak jacket. I originally thought about giving him the traditional chambray Navy shirt, but pictures from the period don't seem to support that. Once painted up, some more detail pops out and I can see that my skills are declining as I get older.
What's interesting about the figure is something that isn't noticed while you're painting him. When you put him in the cockpit, you'll see that along with having his hands on the wheel and throttles he is leaned back against the armor behind him. In other words, he's ready to GO if things suddenly get bad. That is a very nice touch.
 |
| Definitely ready for trouble. |
 |
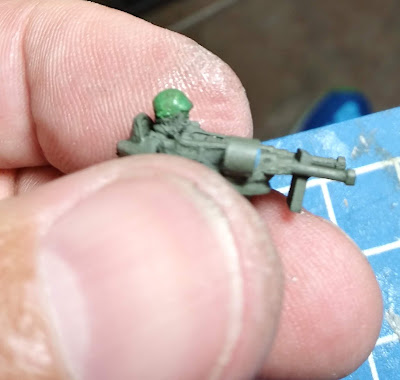
| The tab on the back is where the gunner will go. |
 |
| The knife blade is a #11 X-Acto |
 |
| The patch is made of .01 thickness plastic, and is 4 x 4 mm. |
 |
| Not as clean as I would like, but it works. |
The gun looks like it might sit a little high, but that's because the stern rail hasn't been glued in place yet. Yes, the stern rail is a separate piece. Also, once the gun and gunner are painted and the rail is in place, I will post some action photos.
7/27 update:
Well, my original plan to post photos after the rail and gunner were done didn't quite pan out. There's some good news and bad news in that regard. The good news is that I got a burst of work done and finished several steps. The bad news is that burst came from me screwing up and having to fix it.
When you look at the pictures below, you will see that there are cleats beneath the rail on the stern. They're about 5mm long, and AiM provides 4 of them in the kit. If you're thinking that's the perfect size to lose one without knowing it, you'd be right. So the boat had to sit and wait for awhile while I found something to try and replace what I'd lost. After a while, I found these:
 |
| Very nice people to deal with by the way. |
At this point in my life, I'm smart enough to buy two packages of these cleats. Why, you ask, when there are 8 of them per bag. Well, although they're bigger than the kit cleats, they are still pretty small:
 |
| Each of those hash marks equals 1 millimeter. |
Between dropping them and cutting them up for experiments, I KNEW 8 wouldn't be enough. First, I tried cutting off the base and fitting them into the holes on the kit, but that didn't work. Finally, I had to wind up doing some minor surgery on the boat itself
 |
| One of the scarier moments in my model building life. |
Well, after a bit of worrying they did fit and I trimmed the ends of them so that they would be a bit closer in size to the kit ones. With that done, I finished the aft gunner. This is where I discovered my first mistake.
For some reason, my gunner is too short to reach the back of the gun! If you look closely, you can see that the piece of .01 plastic sheet curves up to reach him. Given how well-engineered the rest of the model is, I'm going to blame myself for this one. Maybe the gun was supposed to be more elevated on the mount? Fortunately though, when the gunner is in place this isn't particularly noticeable.
So the stern gunner can be rotated just like the forward gun tub. Was it worth the trouble? Well, I think so but your mileage may vary. It does look good:
As you can see, the midships pulpit and weapons are in place also. No real problems with anything there, so honestly not much to talk about. The two weapons are very nicely detailed, but as I have a new camera none of the pictures I've taken show off that detail.
With all that done, I circled back to step 1 and finished up the forward gun tub. Since my various methods of trying to patch the air hole didn't work, I bit the bullet and reskinned the helmet using green stuff. I didn't completely fill the divot, but did manage to do a decent job of covering it up.
Since I didn't get the helmet shape quite right, I decided to paint it gray instead of green. I've seen some pictures of that, so it's not completely unrealistic. The rest of the tub (guns, uniform, etc) were painted as per the other figures.
So, that's where she stands right now. The canopy still has to be assembled and installed, and the various masts and antennae installed before I'm done. I think you will agree though, she's starting to look more like a warship (and a lot more crowded).
7/28 Update:
The object today was to get the canopy assembled and put into place. Depending on which of the 3 (!) options you choose, this can range from 0 to 8 parts. The options are:
A) No canopy or frame whatsoever. Obviously, that's the 0 parts option.
B) Canopy frame but no cover. That is the 8 part option.
C) Canopy with cover. That's 7 parts, counting the searchlight and flagpole that go on top of the cover.
According to the instructions, if you choose the canopy with cover, you have the option of not gluing it to the boat so it can be (carefully) removed. I decided to do this, but to be honest I don't think the canopy will ever be removed again. I'll explain that later.
The first picture below is the sprue for the canopy, and the next one has the various parts for the frame circled.
 |
| Yes, one of the green parts was removed before I thought to take the photo. |
If you want to build just the frame, you will need the green parts (those curve around the front of the superstructure), the red side frames and and the circled blue parts which are the top bows that would support the canvas canopy. I bet this would look fantastic, but I find it hard to picture a boat crew going without some sort of shade for 12 hours. Due to that, I decided to go with option C. The fact that these options are available, however, do show the amount of thought that went into the design of this model. Options A or B would be excellent for some sort of training or repair diorama. You can get some idea of what that might look like in the picture below.
 |
| You do have to imagine the cross frames in place and the assembly painted green. |
At first I thought I would have trouble getting the frames painted, but then came up with an idea for a jig that held them in place. I decided to continue an experiment I've been doing on this boat by using a silver paint for the primer coat on the frames. I did this on the stern rail and then installed it before I sealed it. By doing this, some of the green rubbed off in handling and gave the appearance of a metal rail with paint rubbed away to show the natural finish. In that same vein, I primered the canopy with a khaki, and painted over it in various shades of green.
 |
| OK, maybe "jig" is a little too highfalutin' a term.... |
 |
| The searchlight and flag staff will go on after the canopy is in place. |
the flagstaff comes with a flag molded to it. I cut the flag off and used just the flagstaff. I don't think my skills cover painting a decent looking US flag, and it only took about 25 minutes to whip up a double sided one in a graphics program. I'll put that in place after the model is finished.
As of right now, the boat looks like this:
With the canopy in place, she really looks like a PBR now! Just a few more parts, and assembly is finished. My next update will include the finished boat (although it might not be completely weathered to my satisfaction), and my thoughts about the model.
8/4 update:
The boat has actually been finished for a few days, but I haven't had a chance to sit down and take the finishing photos. Also, if you've been following along this far, the last couple of steps are really a bit anticlimactic. For the next to last step, you simply install everything that goes on the front of the cabin. They are, in order of assembly: 1) the ship's siren [it's labelled "light(?)" in the instructions, but is actually the siren], 2) the mast with navigation lights, 3) the two whip antennas and 4) the radar and mast. All very simple, as you can see from the picture below:
I did make one change to the model at this point. Instead of using the two resin whip antennae, I decided to cut two pieces of .025 music wire and use that. In theory, this will hopefully protect the resin mast and radar from gamer's hands. In retrospect, I should probably have replaced the radar mast with some of the same stuff. If you should decide to do the same thing, I would suggest changing the assembly order up and putting the antennae in last.
The colors for the formation lights are based on the instructions for the Tamiya 1/35 scale PBR model. From looking at pictures of the real things, it appears that they could be in various orders, so my red/blue/green top to bottom is not necessarily the only way. The red light on the top of the mast is supposed to be an infra-red distress beacon, so I painted it more of an orange-red color, but the difference is not that noticeable. All of the mast lights and the two searchlights were hit with a coat of Vallejo gloss varnish.
The last step is to glue the six tires to the sides of the boat. It's not necessary to use thread for this, as AiM has very helpfully cast lines around the cleats that can be painted, just like the line for the anchor. When I had to replace the two amidships cleats though, that detail was lost to the knife. So, I simply tied some of my tan string to the tires, glued them in place and then tied the thread around the cleats.
The front tires are handled a bit differently, since the forward cleats molded to the forward deck. For those, I ran the lines down the sides of the cleat, glued them in place and then glued another piece of string over the top to give the appearance of being wound around the cleat.
 |
| It's a small detail, but one that really catches the eye. |
 |
| A picture is better than an explanation in this case, I think. |
So clearly some fading on the cabin front and darker patches on the hull would not be out of place. My personal favorite is the self-painted(?) whitewall on the side for a touch of class. That is definitely something to consider for the next model I build.
Final Thoughts:
Well, my first thought is that I probably should have built this one last, as I'm afraid everything else is going to suffer in comparison to it! To call it a gaming piece is to sell it short; it is a true 1/100 scale model. As I said earlier, I am a little worried about the all resin construction, as opposed to the traditional mixture of resin and metal. The wire antennae that I installed should go a long ways towards protecting the taller resin parts though.
In short, this is the Cadillac of 15mm PBR models on the market. It's also the most expensive, at $20 a copy plus shipping as of August 2018. Is it worth it? I think so. Buy this model, and there is no need to do any modifications or add any parts, unless you are building a VERY specific PBR. The different options for the canopy give the possibility of building 3 different boats without them looking alike, which could be very useful for diorama builders or people who want variety on the game table. If you're interested in Vietnam-era Brown Water Navy craft, then this is a must have for you.


